KP RacingDashboard
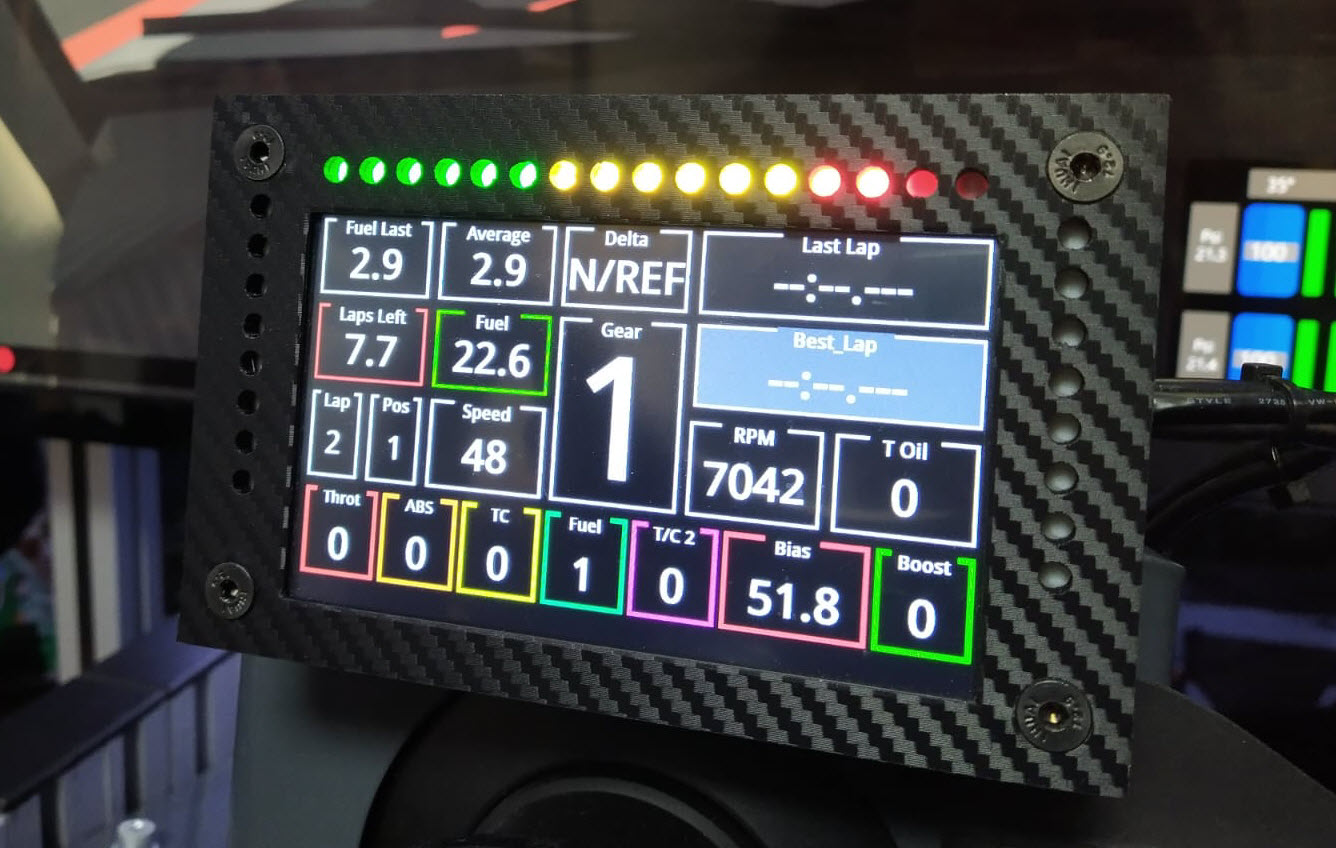
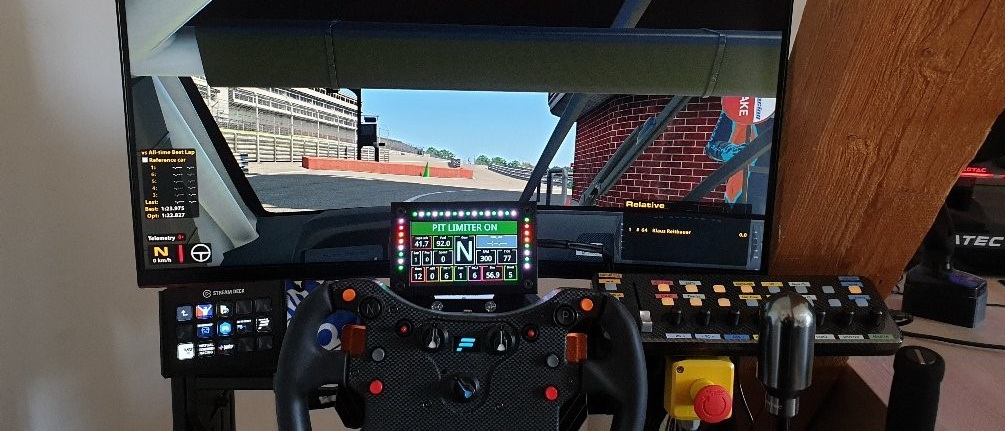
This project is a DIY project developed by Peter W. based on a 5-inch HDMI display. The dashboard consists of a 5-inch HDMI display, a 3D pressure housing, 4 LED strips (RPM, tank display, brake pressure, flags, pit, etc.), a magnetic mount for individual mounting, cables and screws. The dashboards are displayed with Simhub (Z1 should also work, has not been tested).
Parts list*
- Display: https://www.amazon.de/gp/product/B01F3JI58G
- Developer Boad: https://www.amazon.de/gp/product/B0713ZRJLC
- Led bars: https://www.amazon.de/gp/product/B07J2PM5TP/
- HDMI Adapter: https://www.amazon.de/gp/product/B06XR8RBTQ
- HDMI Cable: https://www.amazon.de/AmazonBasics-SSD0_B_6-Geflochtenes-HDMI-Kabel/dp/B075ZWY1SK
- Mini USB Cable: https://www.amazon.de/Ladekabel-Controller-geflochten-vergoldet-schwarz-2-x-4m-blau-schwarz/dp/B01KVCNH1A
- Magnets: https://www.amazon.de/gp/product/B07SJZNZ3N/
- Carbon film: https://www.amazon.de/gp/product/B07VGR8S7F
3d
The files for 3D printing can be found here:
- Dropbox: dropbox.com/
- Mirror: simracing-pc.de/
Files for Simhub:
- Led profiles:
- Dropbox: dropbox.com
- Mirror: simracing-pc.de/
- Dashboards: https://www.precisionsimengineering.com/s/DDU-Software-Package.zip
Wiring
Information on cabling can be found here: https://forum.virtualracing.org/showthread.php/119940-KP-Racing-Dashboard. Further information can also be found here: https://www.youtube.com/watch?v=u5kZjg_sJdg and here: https://github.com/SHWotever/SimHub/wiki/Arduino–Setup.
Instructions (by Peter W.)
1. The SIMDAHBOARD DIY is designed for a Windows 10 PC only. For other OS, the function cannot be guaranteed.
2. A free USB2.0 or higher is required on the PC and a free HDMI slot is required. In addition, a USB charger with a power of at least 2A is required for power supply (mobile phone charger)
3. The SIMDASHBORD DIY runs with the program SIMHUB. This can be downloaded for free. However, for full support with 60FPS I recommend buying the program for 5€. Download here: https://www.simhubdash.com/. The SIMDASHBORD DIY should basically support Z1 Dashboard but has not yet been tested.
4. The SIMDASHBORD DIY uses an Arduino for LED control. The necessary driver to be downloaded and installed: https://www.elegoo.com/download/
5. If everything is installed, the PC has to be restarted, after which we are ready to start. *Open SIMHUB and click Dash Studio. *Then right click on the dashboard of your choice and select “On specific monitor”.
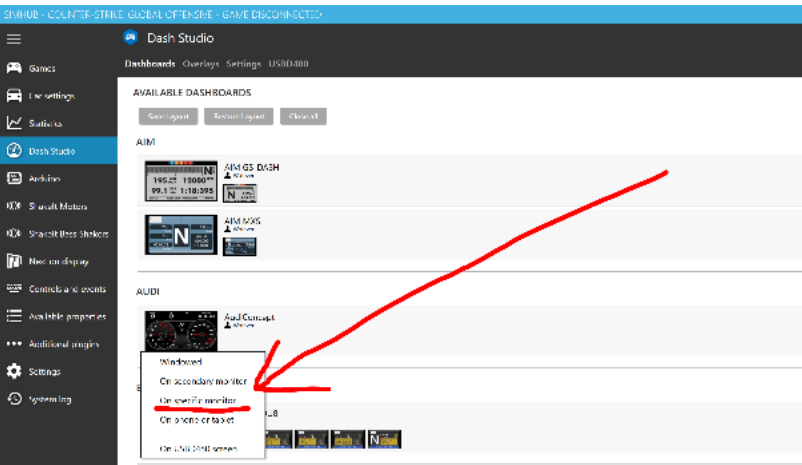
6. After selecting the 5-inch screen, the dashboard will appear on the selected screen.
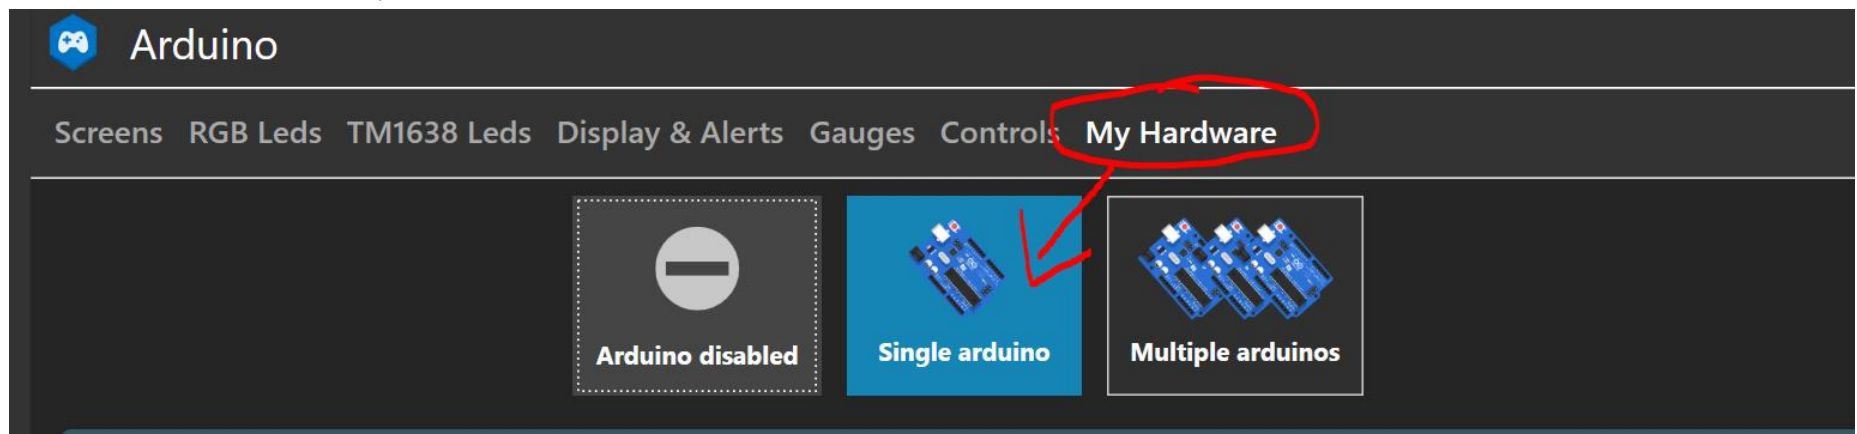
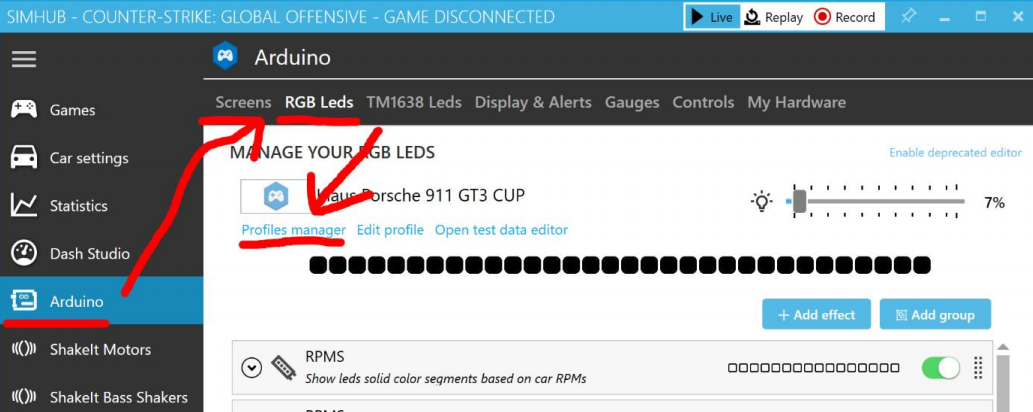
7. Now we come to the LED. Import the file sent by MIR as follows. First in Simhub on ARDUINO, then on MY HARDWARE and SINGLE ARDUINO select:
Then click RGB LEDS and then click on PROFILES MANAGER:
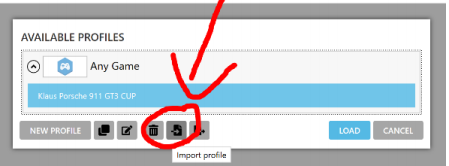
8. For AVAILABLE PROFILES, select Import profile and select my file:
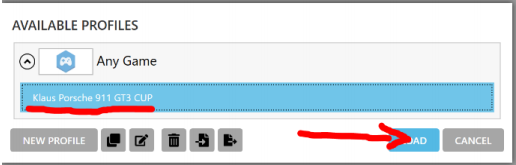
Then comes the:

Then click on profile and press LOAD:
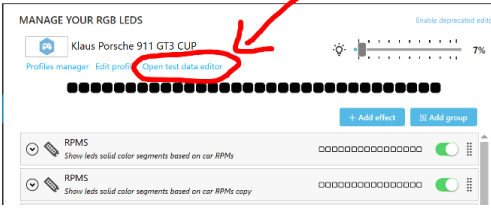
9. Now everything is ready.
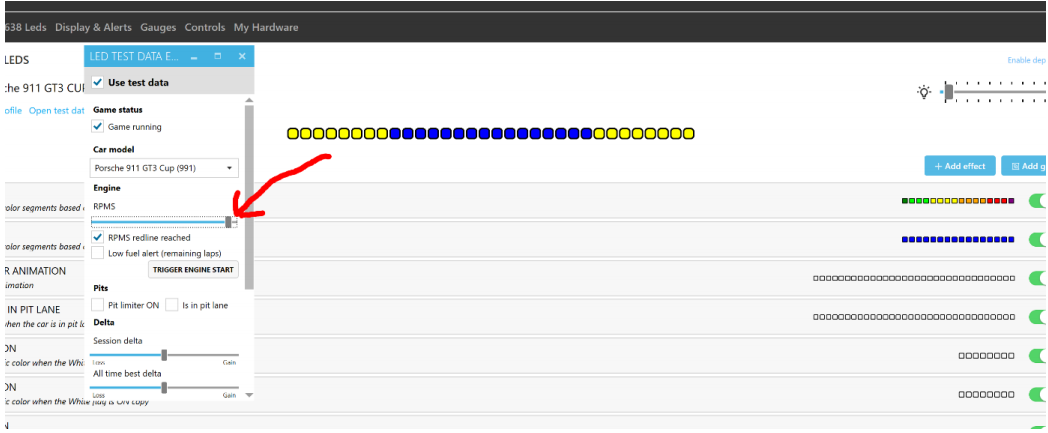
10. Click to check on “Open test data editor” and change the parameters Now everything works. Have fun with it:
The dashboard in action
Matching skins
If someone is interested in matching skins: Dennis (from Liongp) has all DXF files and makes matching sticker sets on request:https
://www.instagram.com/liongp.com_racing/

Donate to the creator


The files for the dashboard itself link to the LED profile. Is it possible to share the dashboard template? Thanks!
fixed