Creality Ender 3 V3 SE 3D printer – Review
3D printers have been getting cheaper, faster and also easier to use for years. The times when 3D printers were only for experts are long gone. The Creality Ender 3 V3 SE offers several improvements over its predecessors, making it particularly attractive for DIY enthusiasts in the entry-level class.
Order and shipping
The printer tested here was provided by Geekbuying and shipped directly from a warehouse in the EU via DHL. Alternatively, the printer can also be purchased directly from Creality or Amazon, for example, although the price is about 10-20% higher here.
You can save 30€ with the coupon NNNDEV3SE, which results in a price of 199€ including shipping from the EU.
Specs
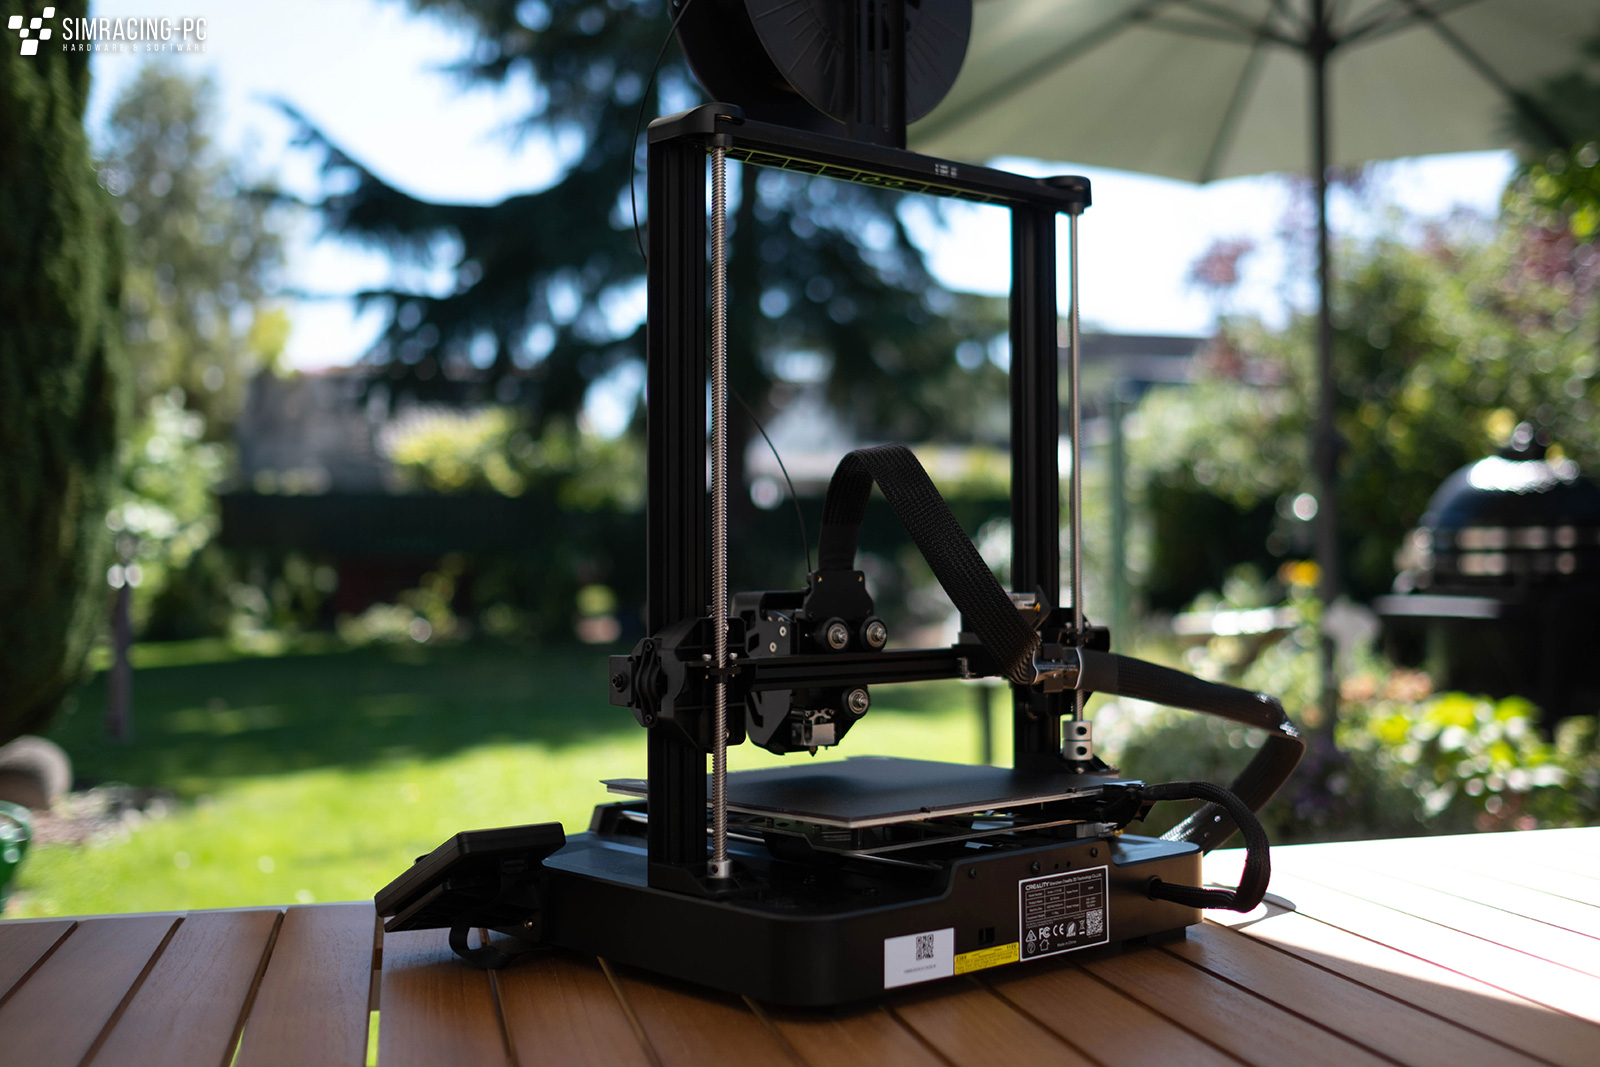
When looking at the technical data, the very compact dimensions of the printer are immediately noticeable, although they also limit the maximum build volume to 220 x 220 x 250 millimeters. According to Creality, the non-enclosed printer can be operated with PLA, PETG and TPU (hardness 95A) and reaches a maximum temperature of 260° (at the nozzle) / 100° (at the print bed). Also noteworthy is the significantly higher maximum print speed of up to 250 mm/s compared to its predecessors.
| Produktabmessungen | 349*364*490mm |
| Bauvolumen | 220*220*250mm |
| Abmessungen der Verpackung | 575*390*235mm |
| Nettogewicht | 7.12kg |
| Bruttogewicht | 9.14 kg |
| Typische Druckgeschwindigkeit | 180mm/s |
| Max. Druckgeschwindigkeit | 250mm/s |
| Beschleunigung | 2500mm/s² |
| Druckgenauigkeit | ±0,1mm |
| Extruder Typ | “Sprite” Direkter Extruder |
| Nivelliermodus | Automatische Nivellierung |
| Düsentemperatur | ≤260°C |
| Heizbett-Temperatur | ≤100°C |
| Hauptplatine Typ | 32-bit Silent Hauptplatine |
| Unterstützte Filamente | PLA, PETG, TPU(95A) |
| Schnittsoftware | Creality Print, Cura, Repetier-Host, Simplify3D |
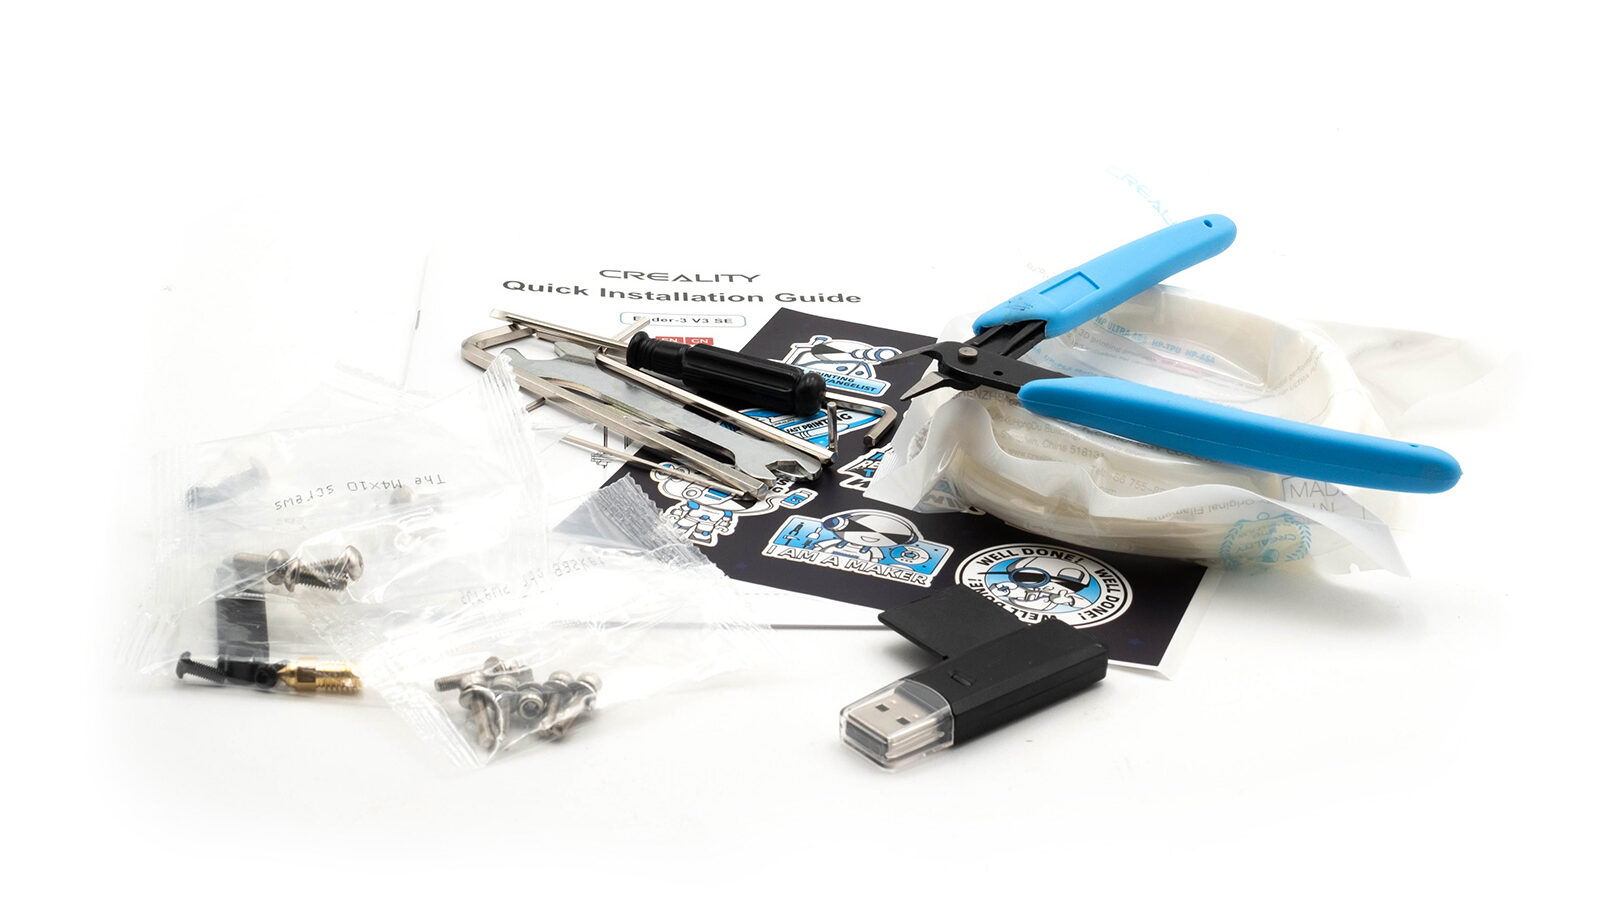
Scope of delivery
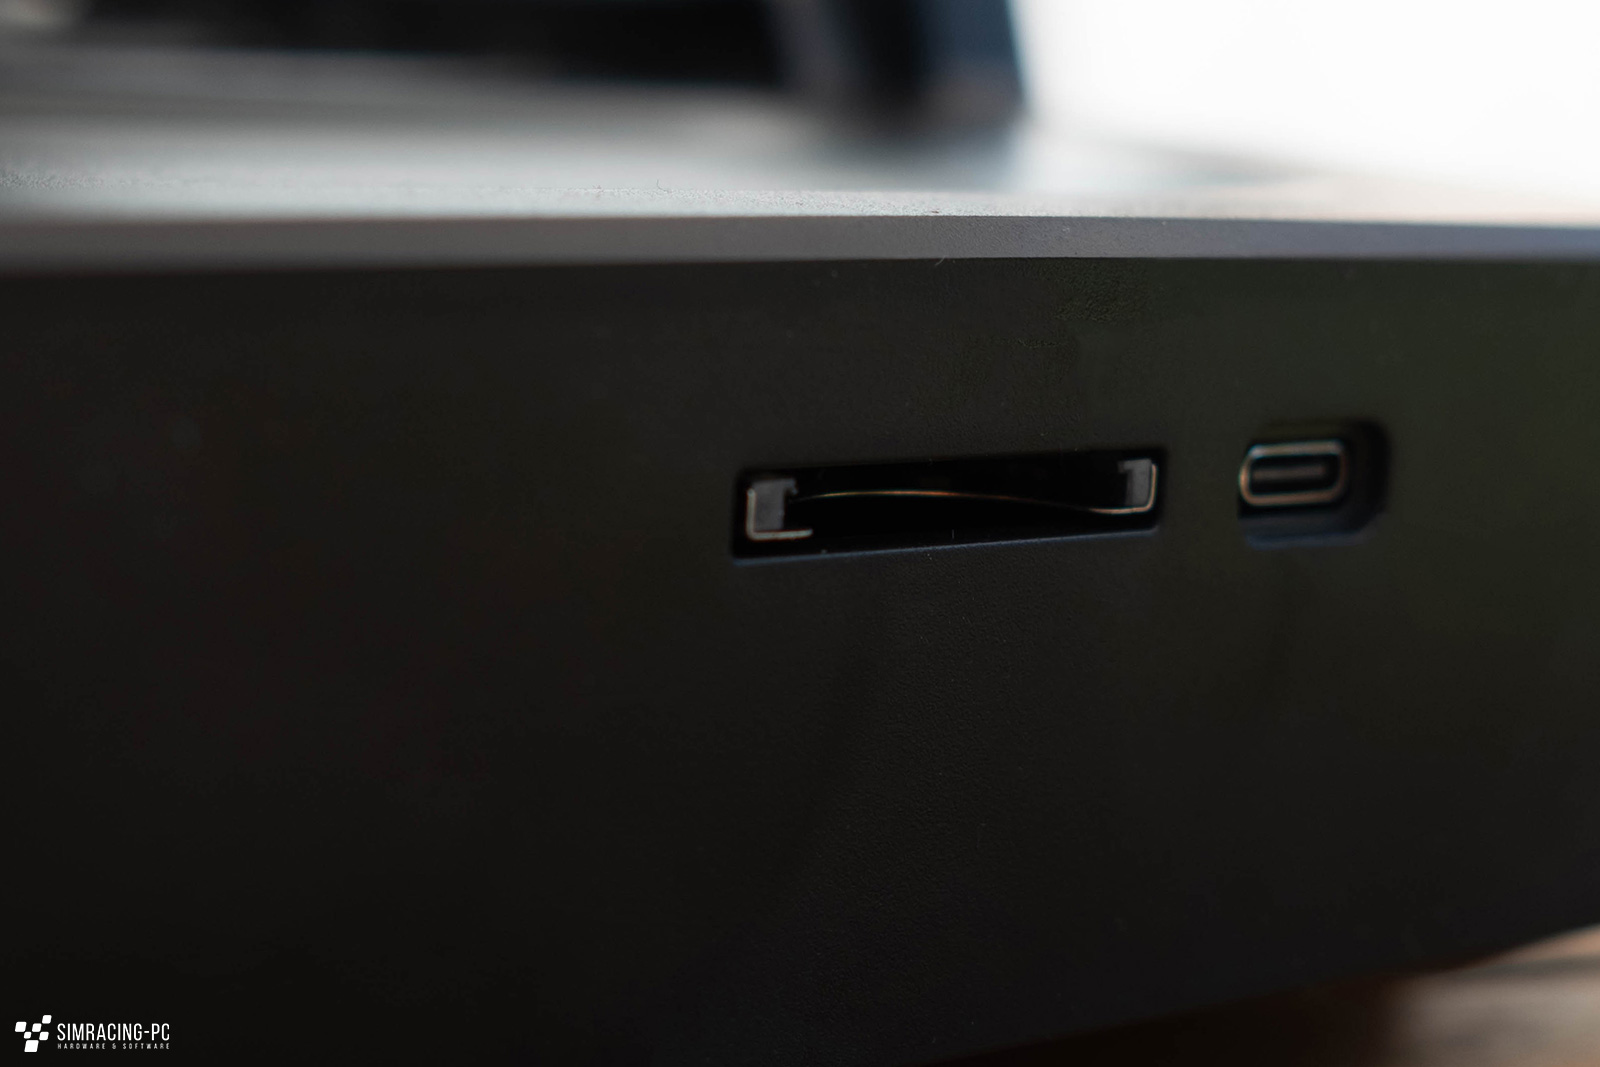
In addition to the almost completely pre-assembled printer itself, we find the familiar accessory package in the scope of delivery, as it can be found with many printers today. Among other things, the accessories consist of an 8GB SD card including a USB card reader as well as tools for assembly and a side cutter for cutting the filament.
The scope of delivery is rounded off by a replacement nozzle and a sticker sheet.
Assembly
Creality claims the assembly time to be about 10 minutes. Often such information is sugar-coated, but in this case it is more than accurate. The printer is delivered almost completely pre-assembled and only a few steps are necessary to assemble it.
These are so simple and described in detail in the manual that even with limited skills, you can have an operational printer in front of you in just a few minutes. Only when setting the voltage of the power supply should you make sure that you choose the right voltage for your region. You should always check this before putting the printer into operation and not rely on a supposedly correct default setting.
Furthermore, it is always recommended to check all screw connections. This time, for example, the screws of the print bed were no longer 100% tight (probably due to transport).
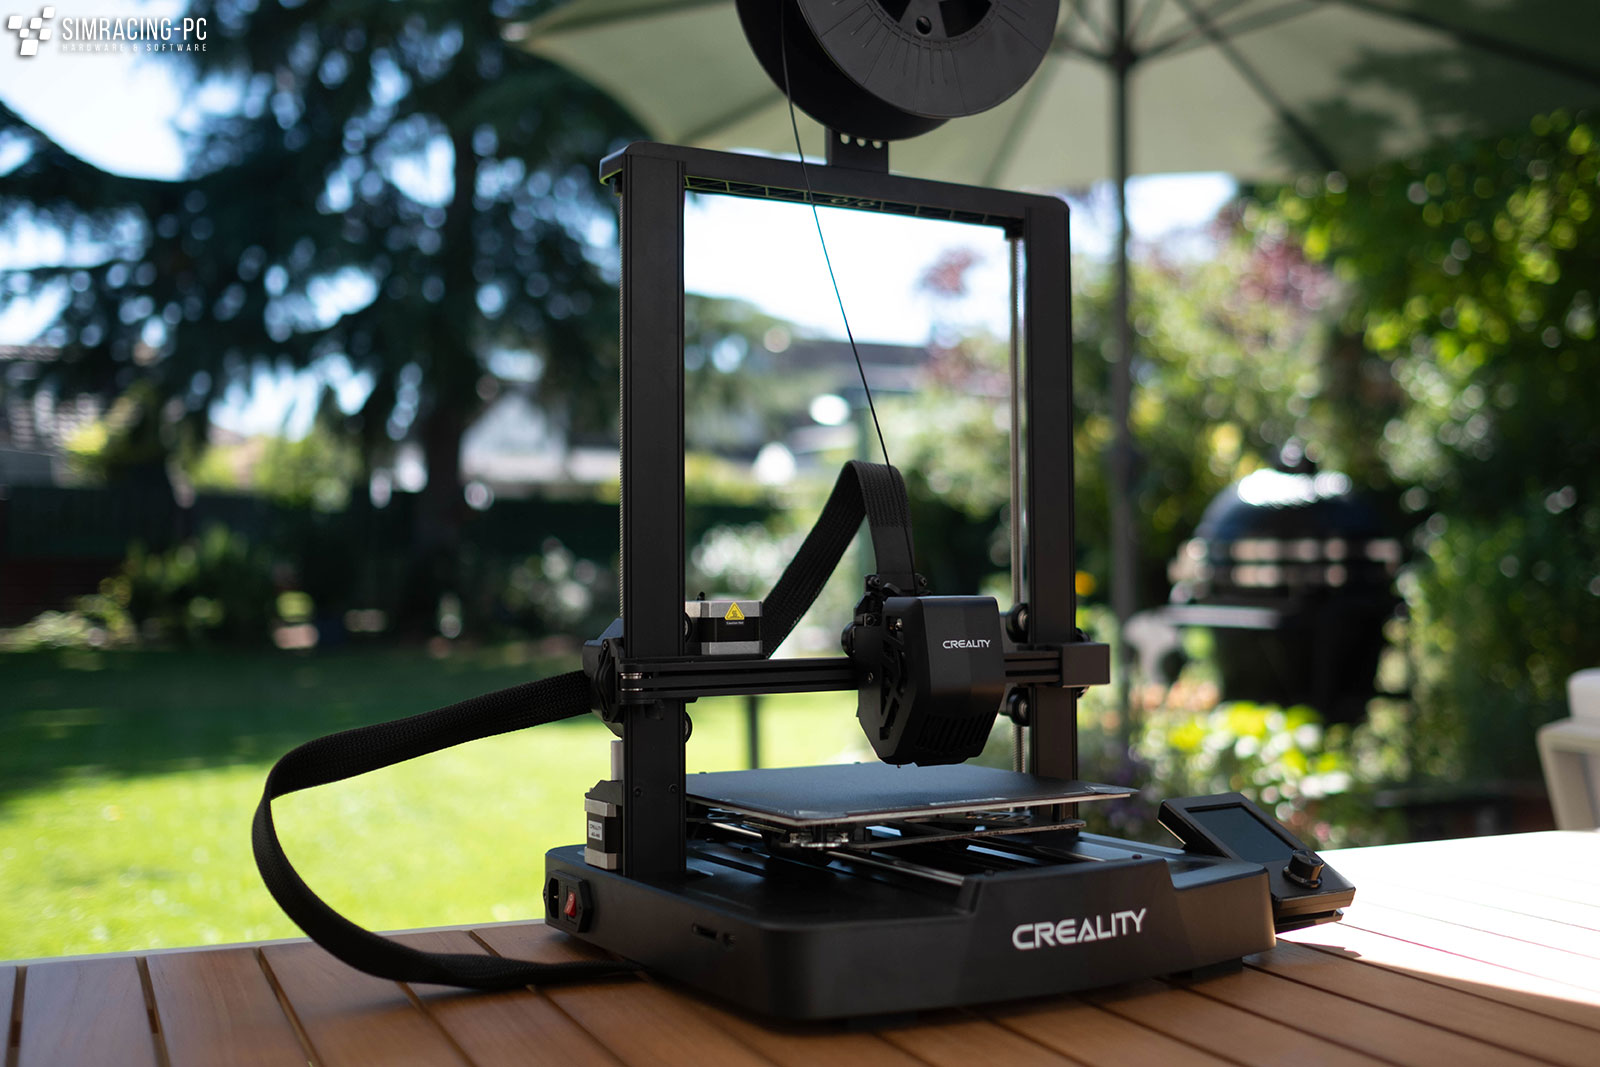
Hardware (Features)

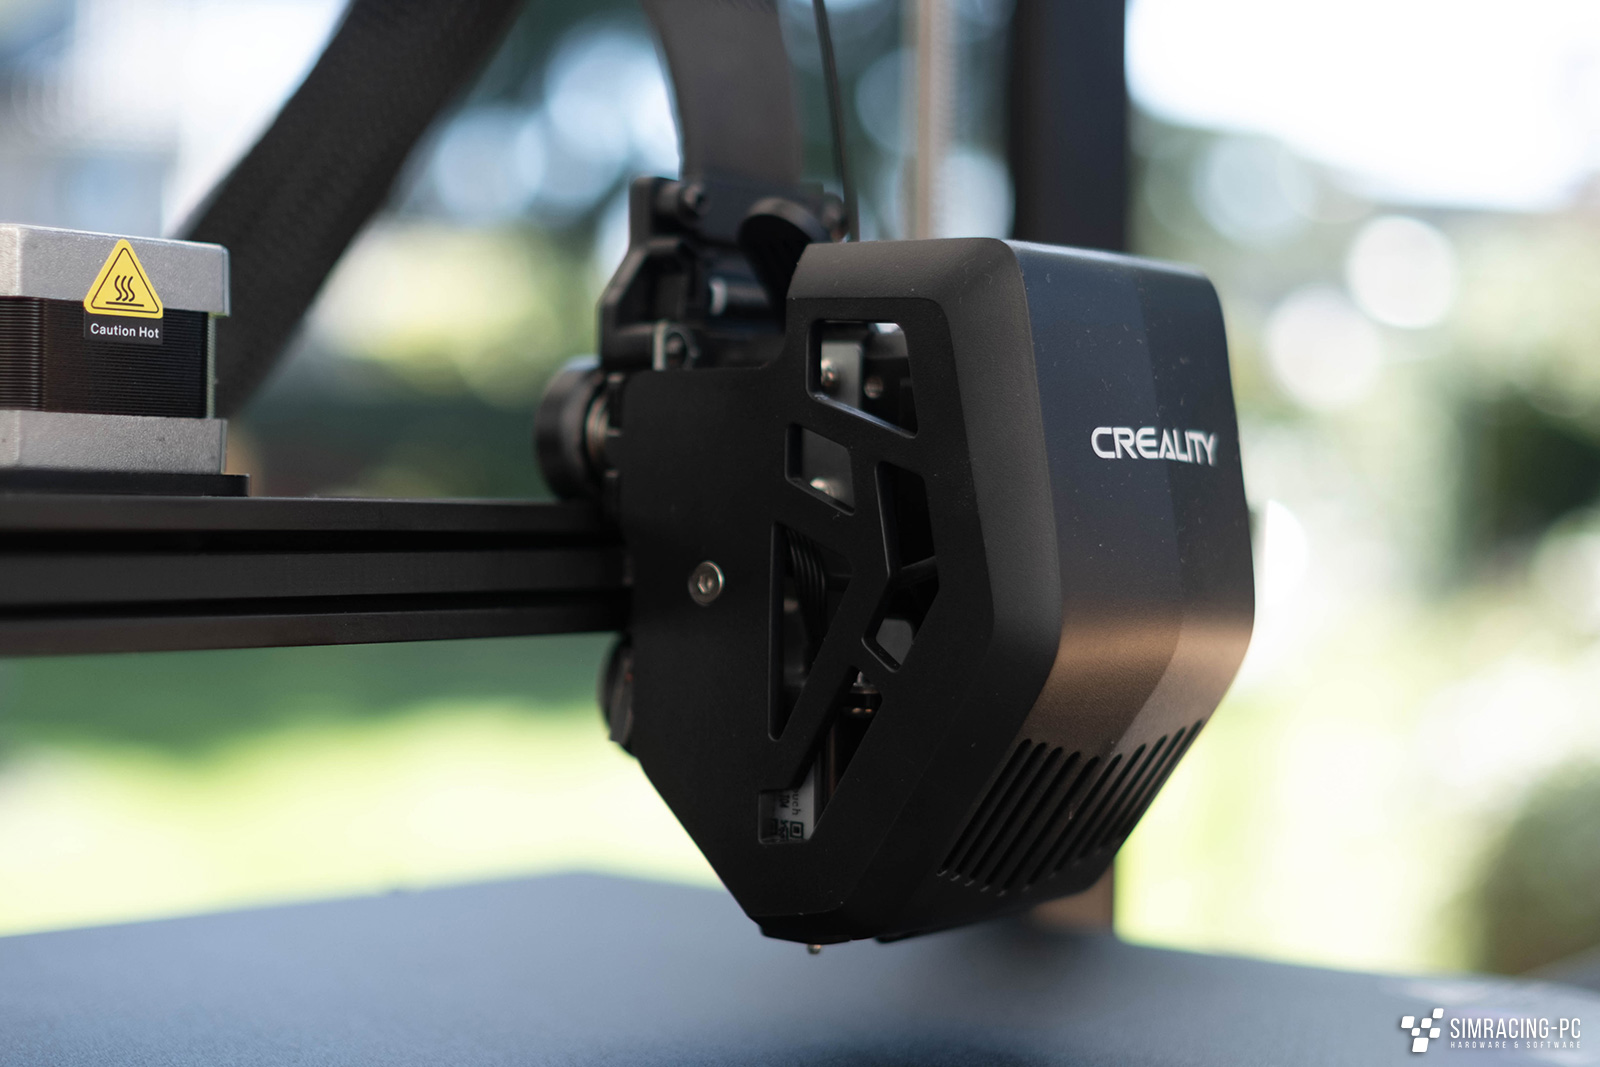
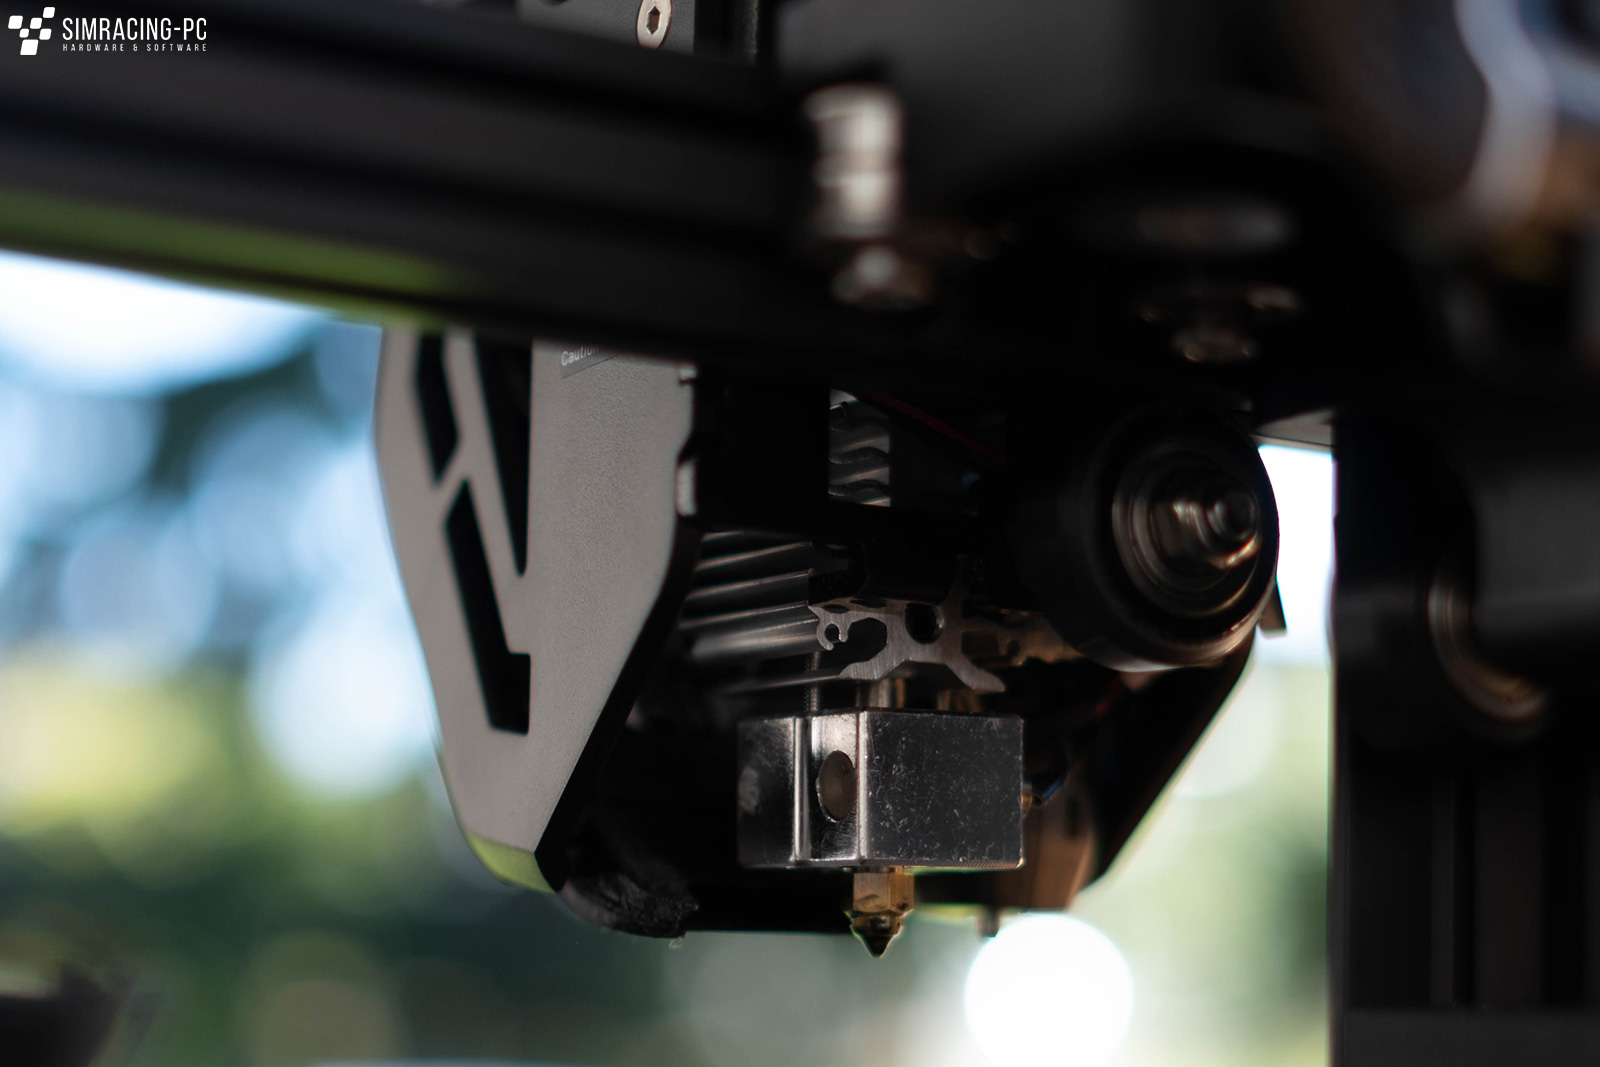
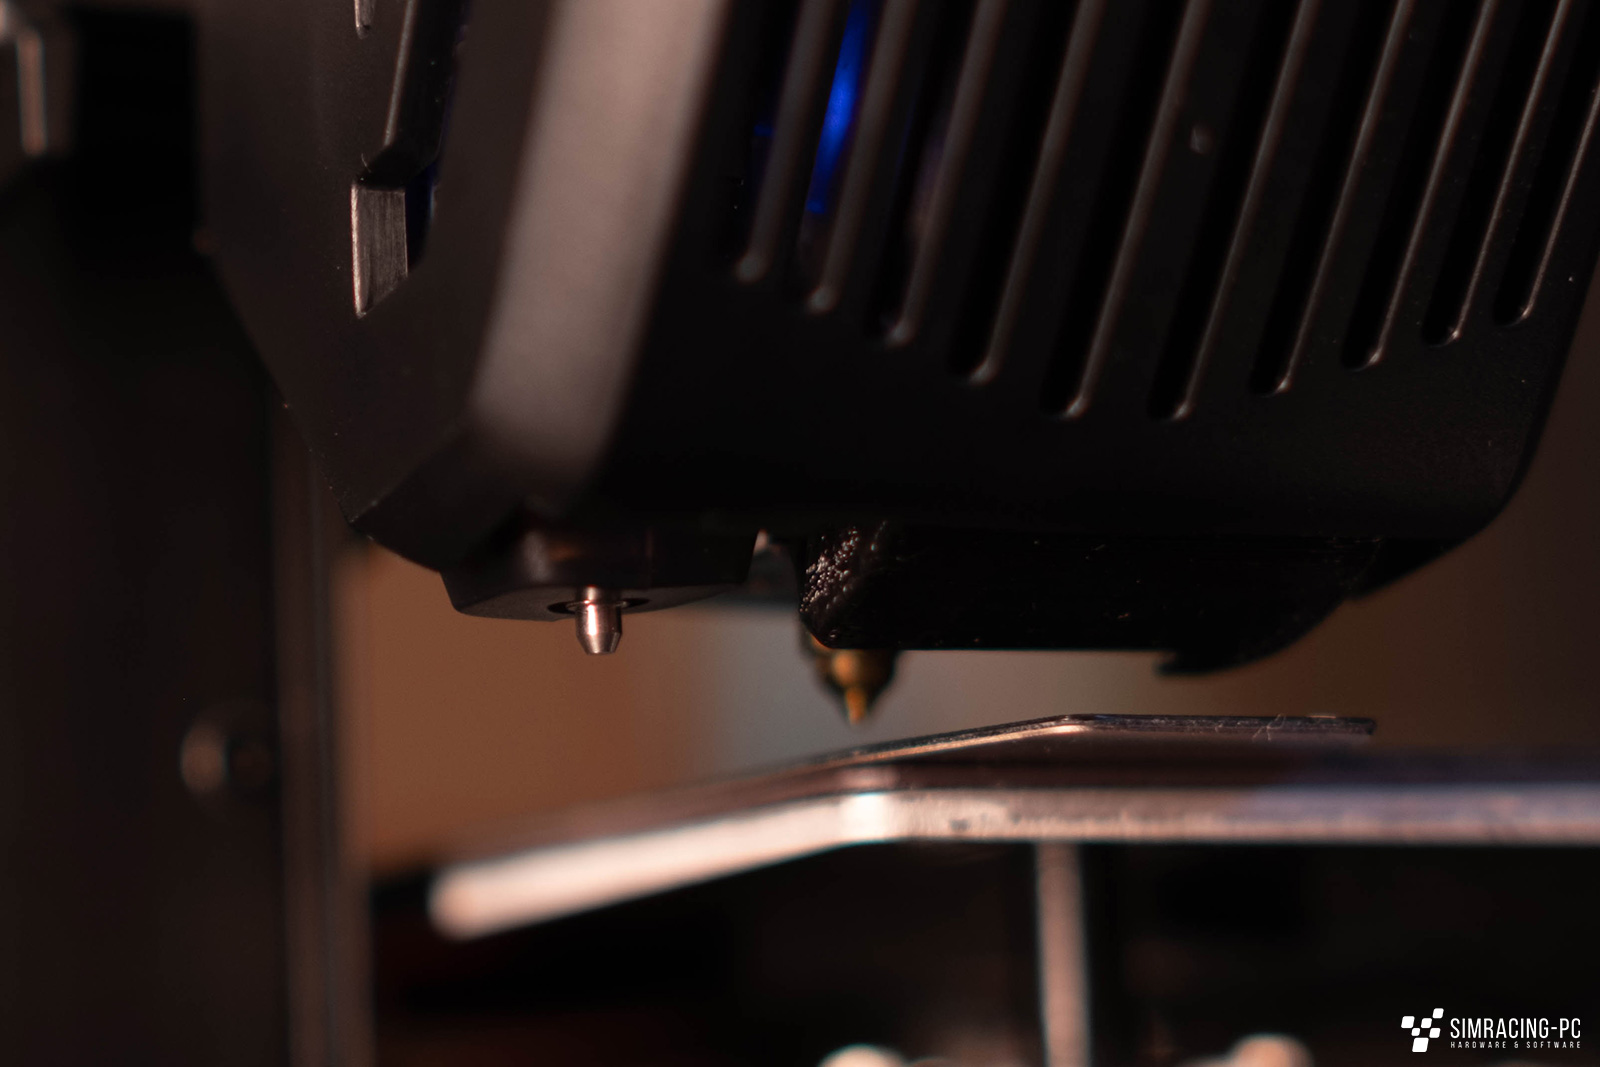
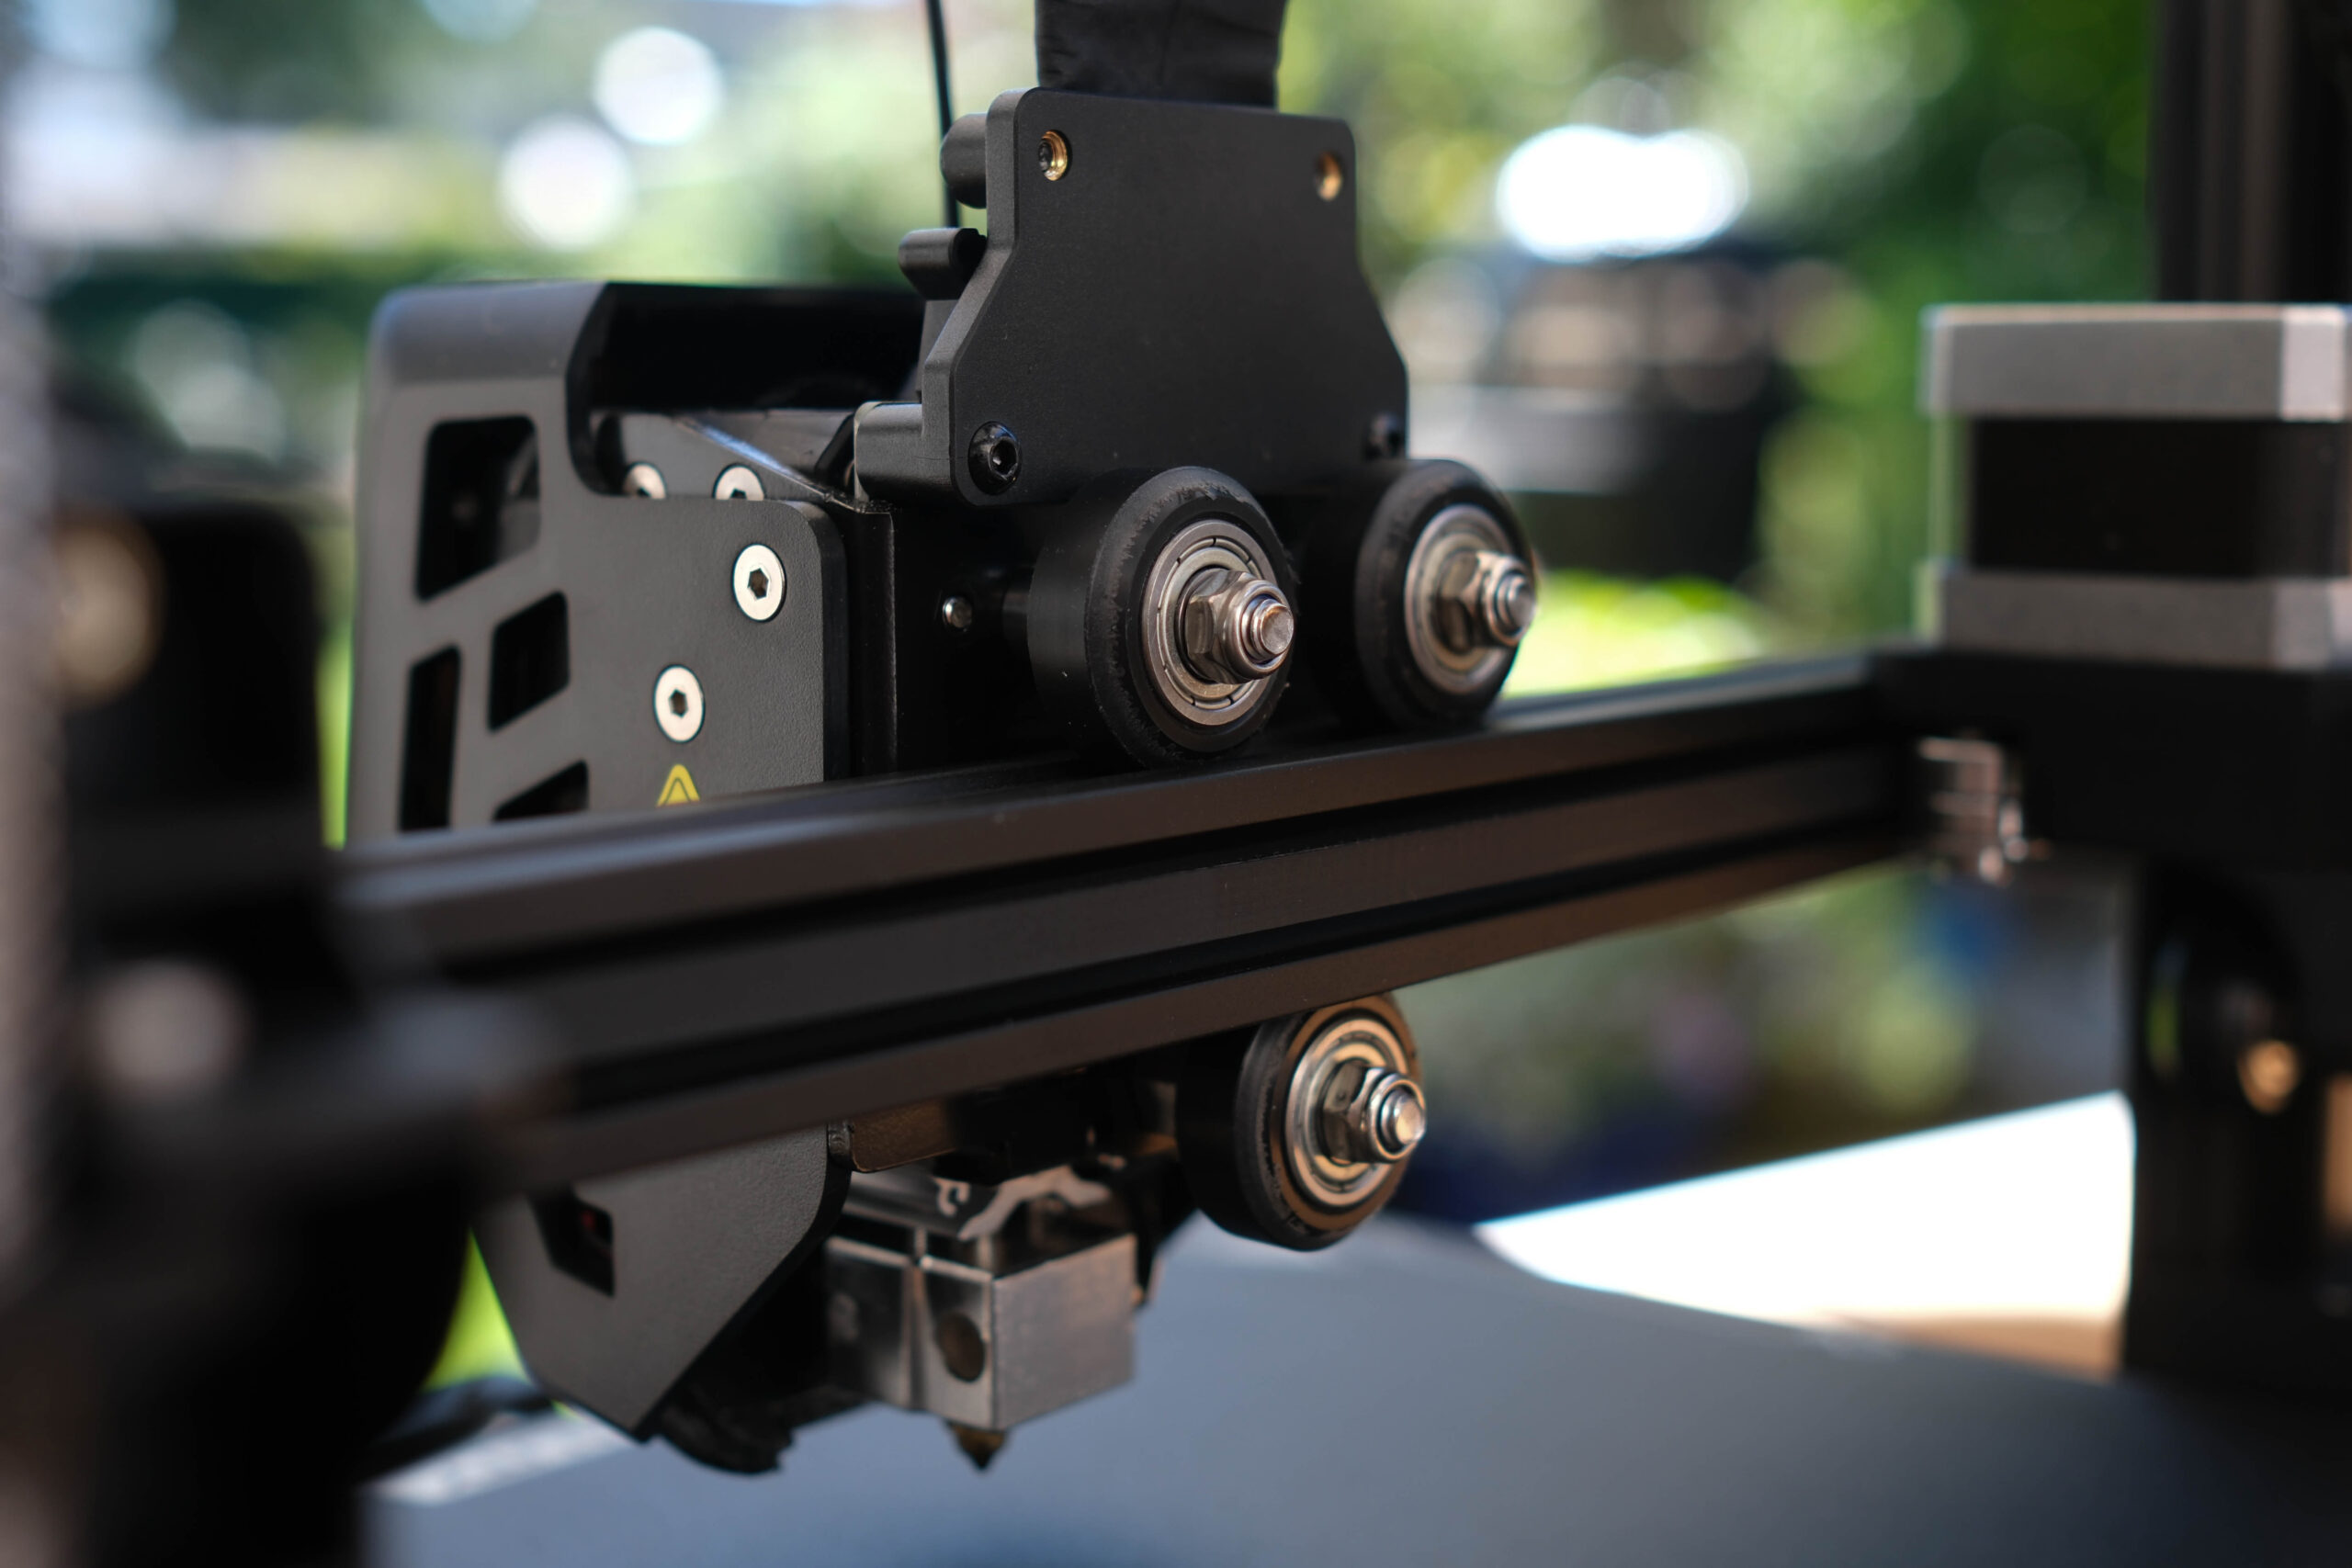
Direct Extruder
Probably the most important feature is the Sprite Direct Drive extruder from Creality, which is used for the first time as standard in an Ender printer in the budget class. The proximity of nozzle and extruder means that there is no need for high retract values and, above all, printing with TPU is much easier to realize. The filament is fed from the top and only has a path of a few centimeters to the 0.4 mm nozzle of the printer due to the compact design. Unfortunately, the built-in fan is very loud at high speeds, causing the otherwise very quiet printer to lose some of its potential living room suitability.
Creality specifies the usable filaments as PLA, TPU and PETG.
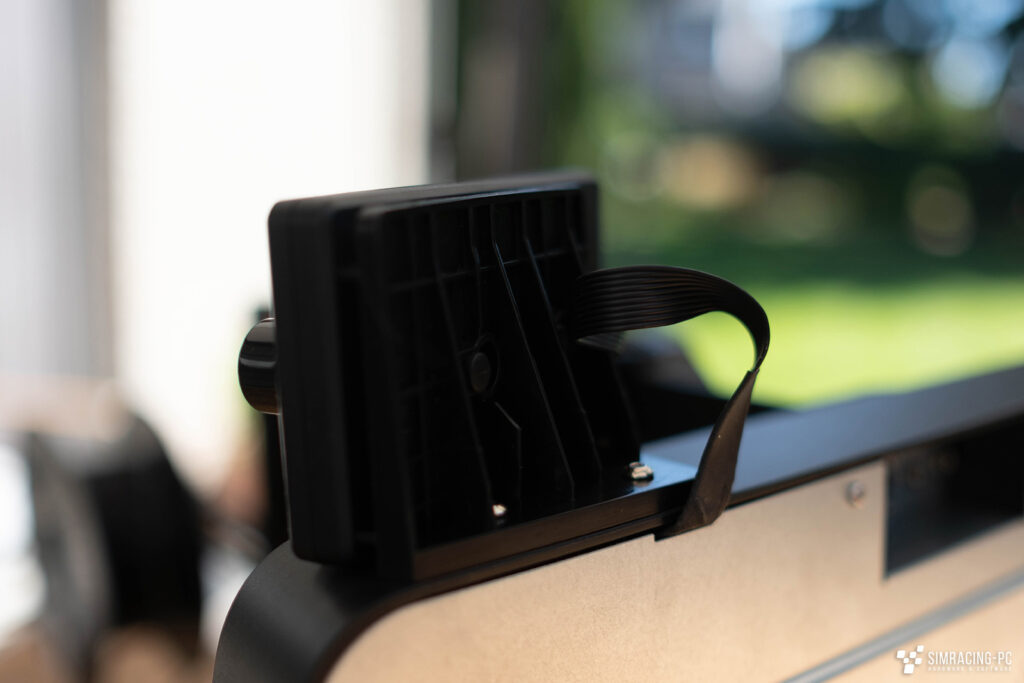
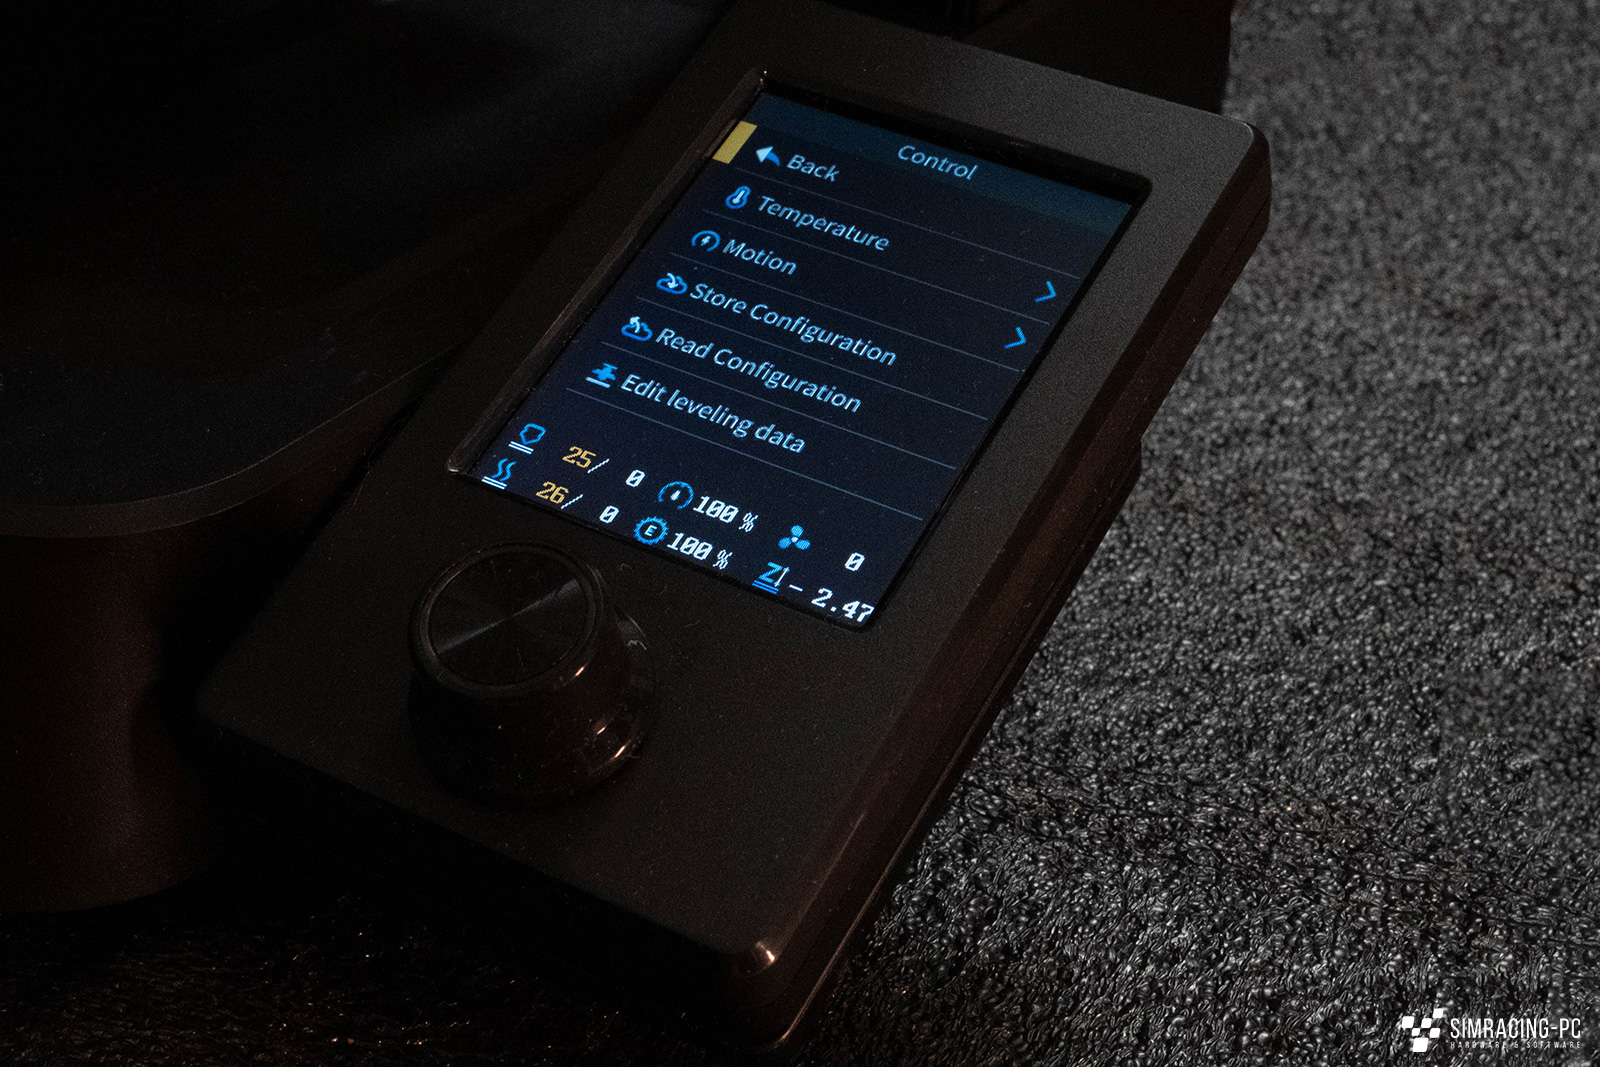
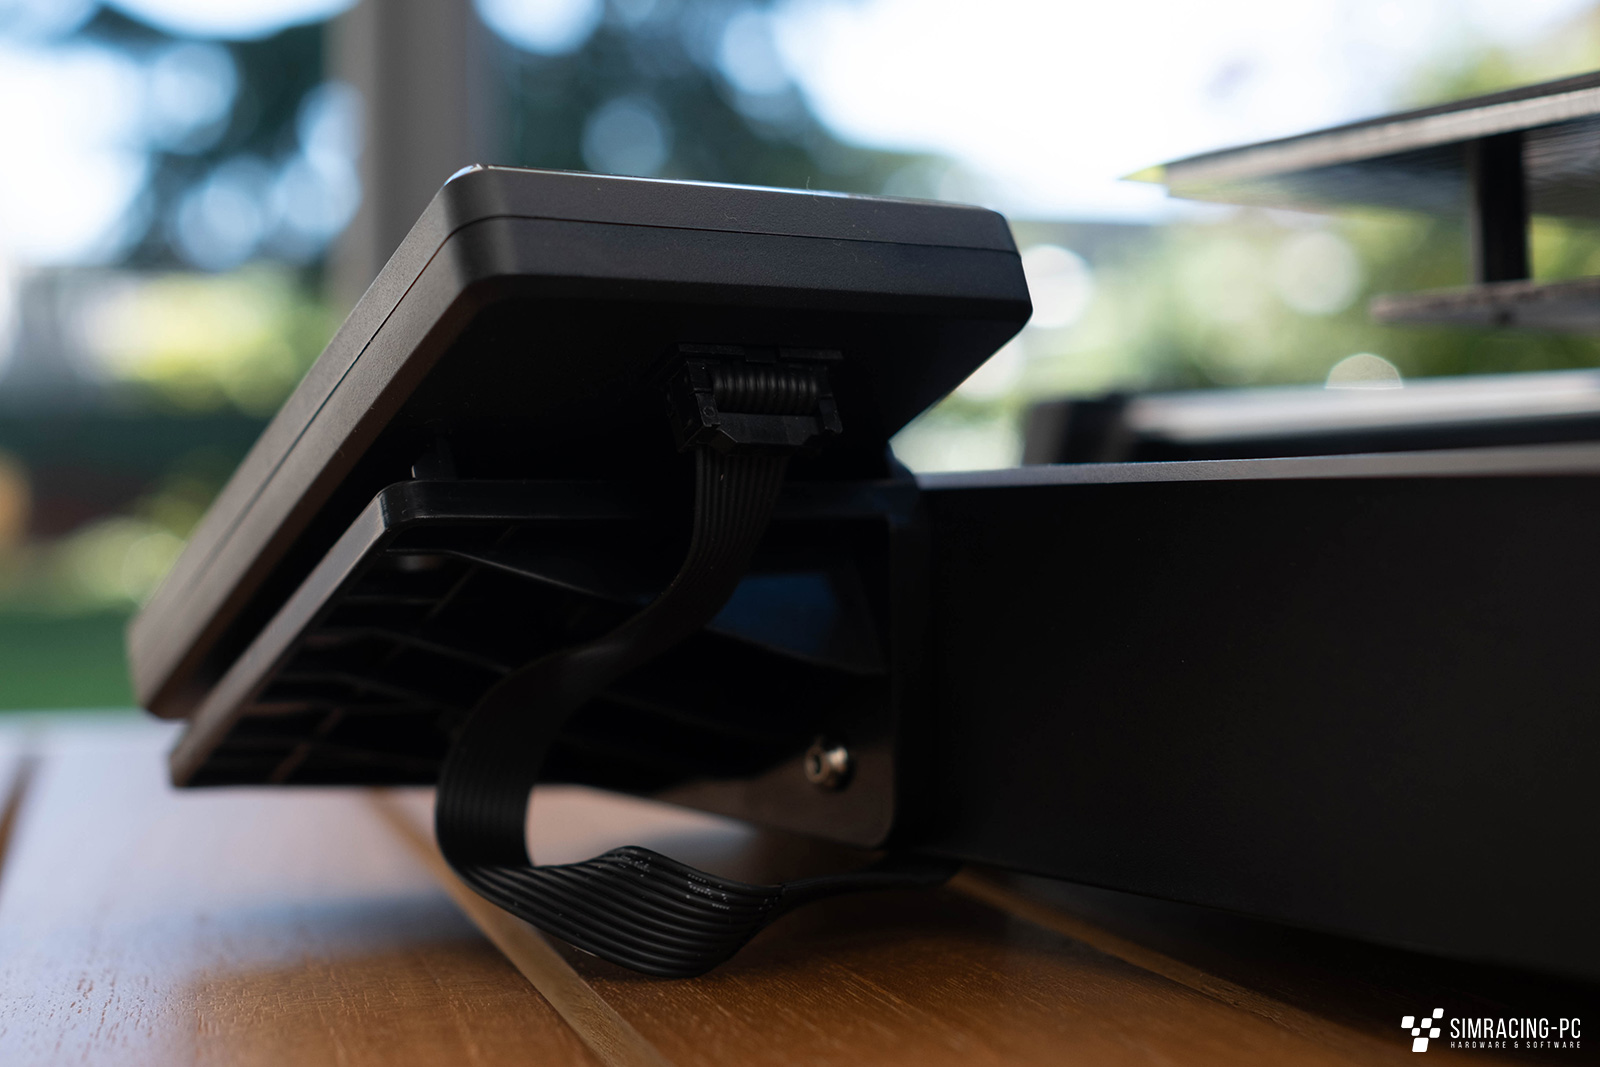
Display
A color display is located on the right side of the device for operating the printer. It has a sufficient resolution and is operated via a rotary knob. Even though a touchscreen would be advantageous in some areas of the menus, you can navigate quickly and precisely through the menus with the rotary knob. Only a dedicated “back” button could increase the comfort a bit more depending on the menu situation. Overall, the color display makes a good impression, and community mods will certainly allow alternative installation positions in the future.
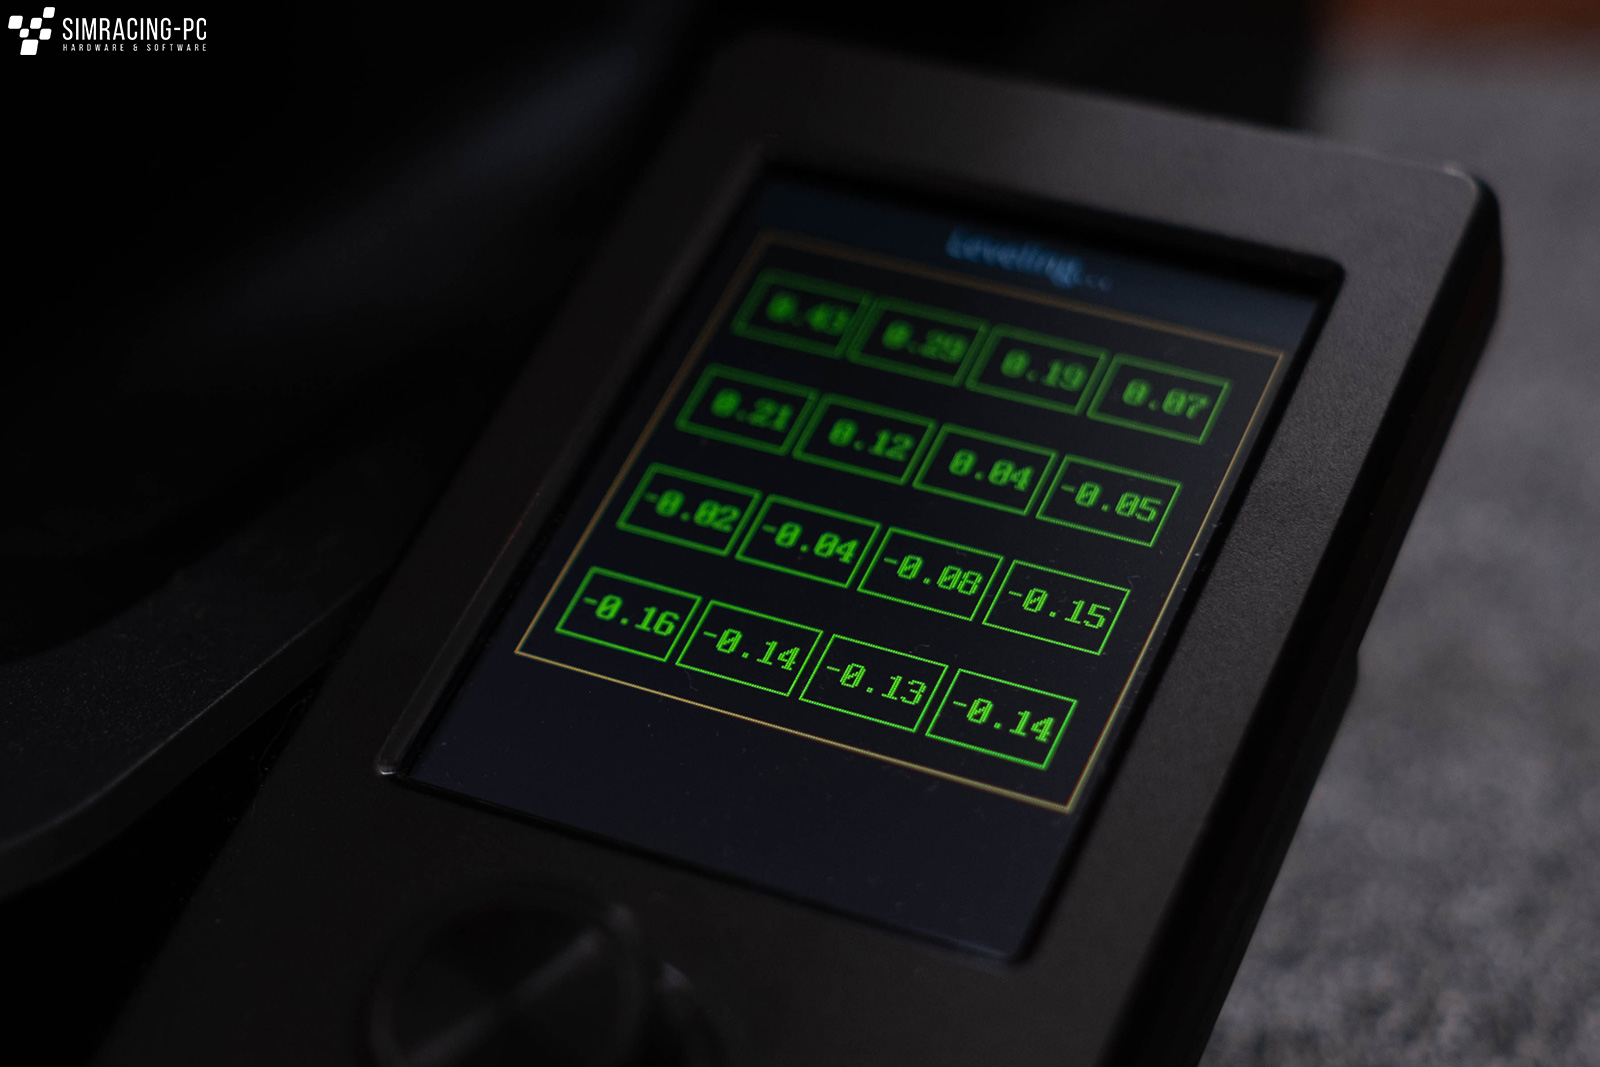
Auto-Leveling
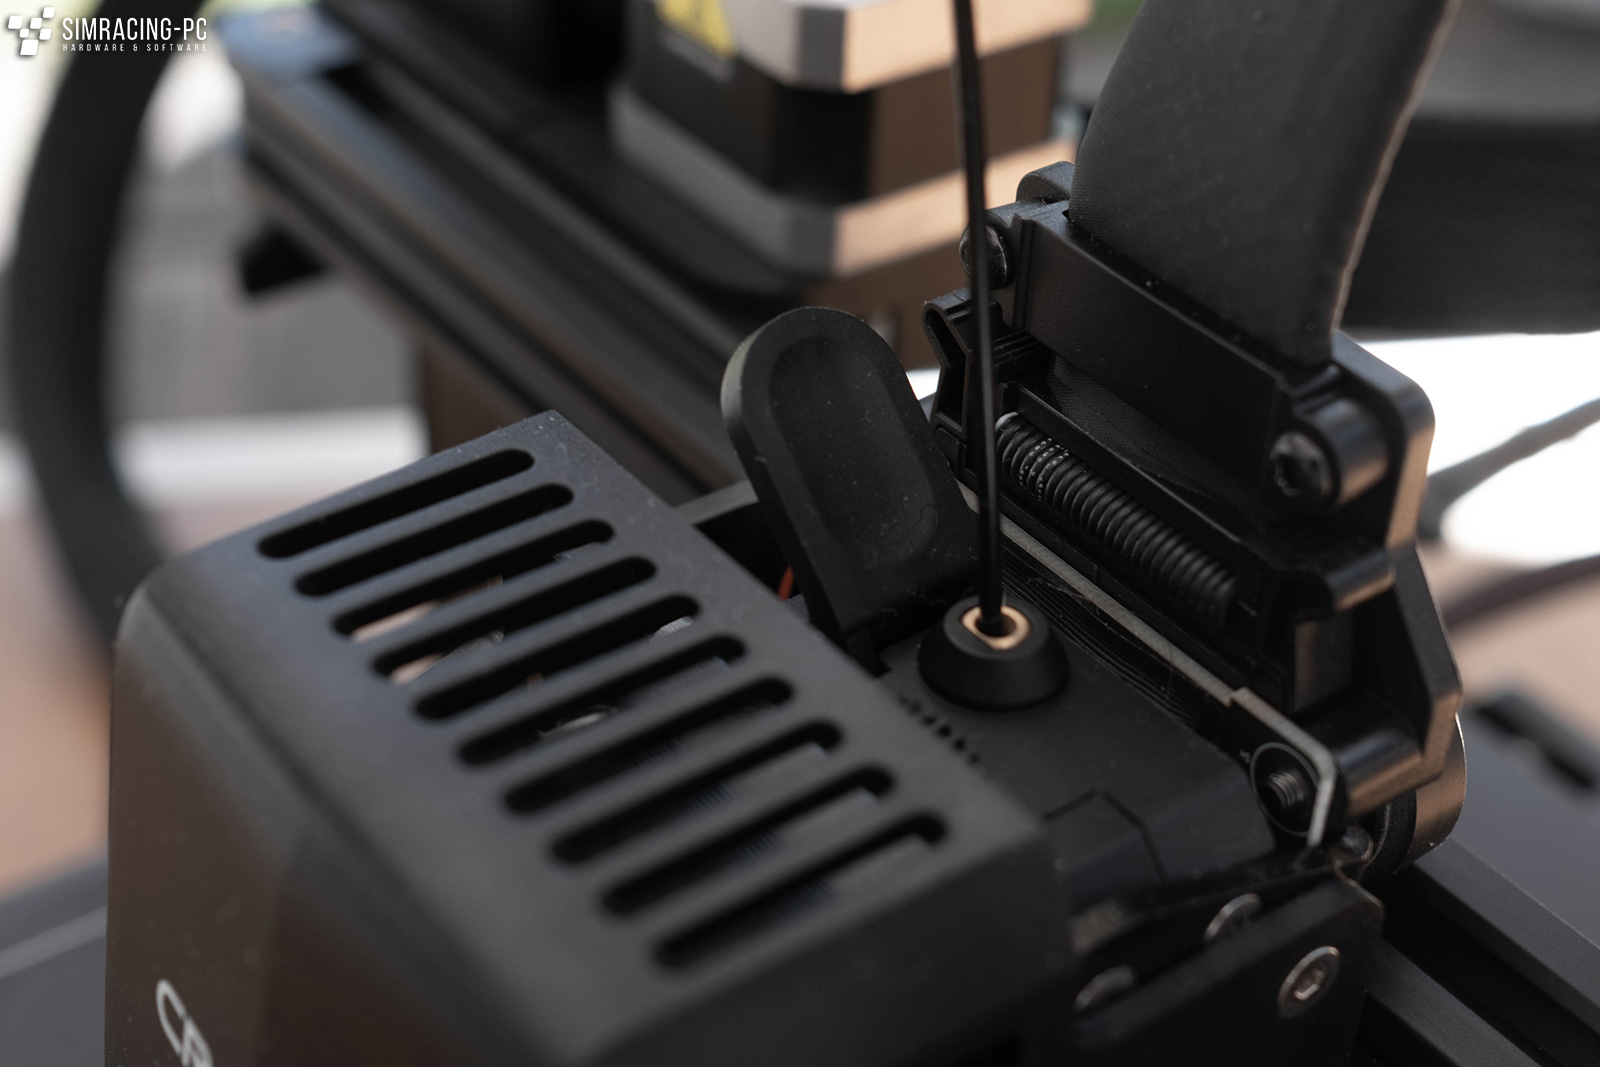
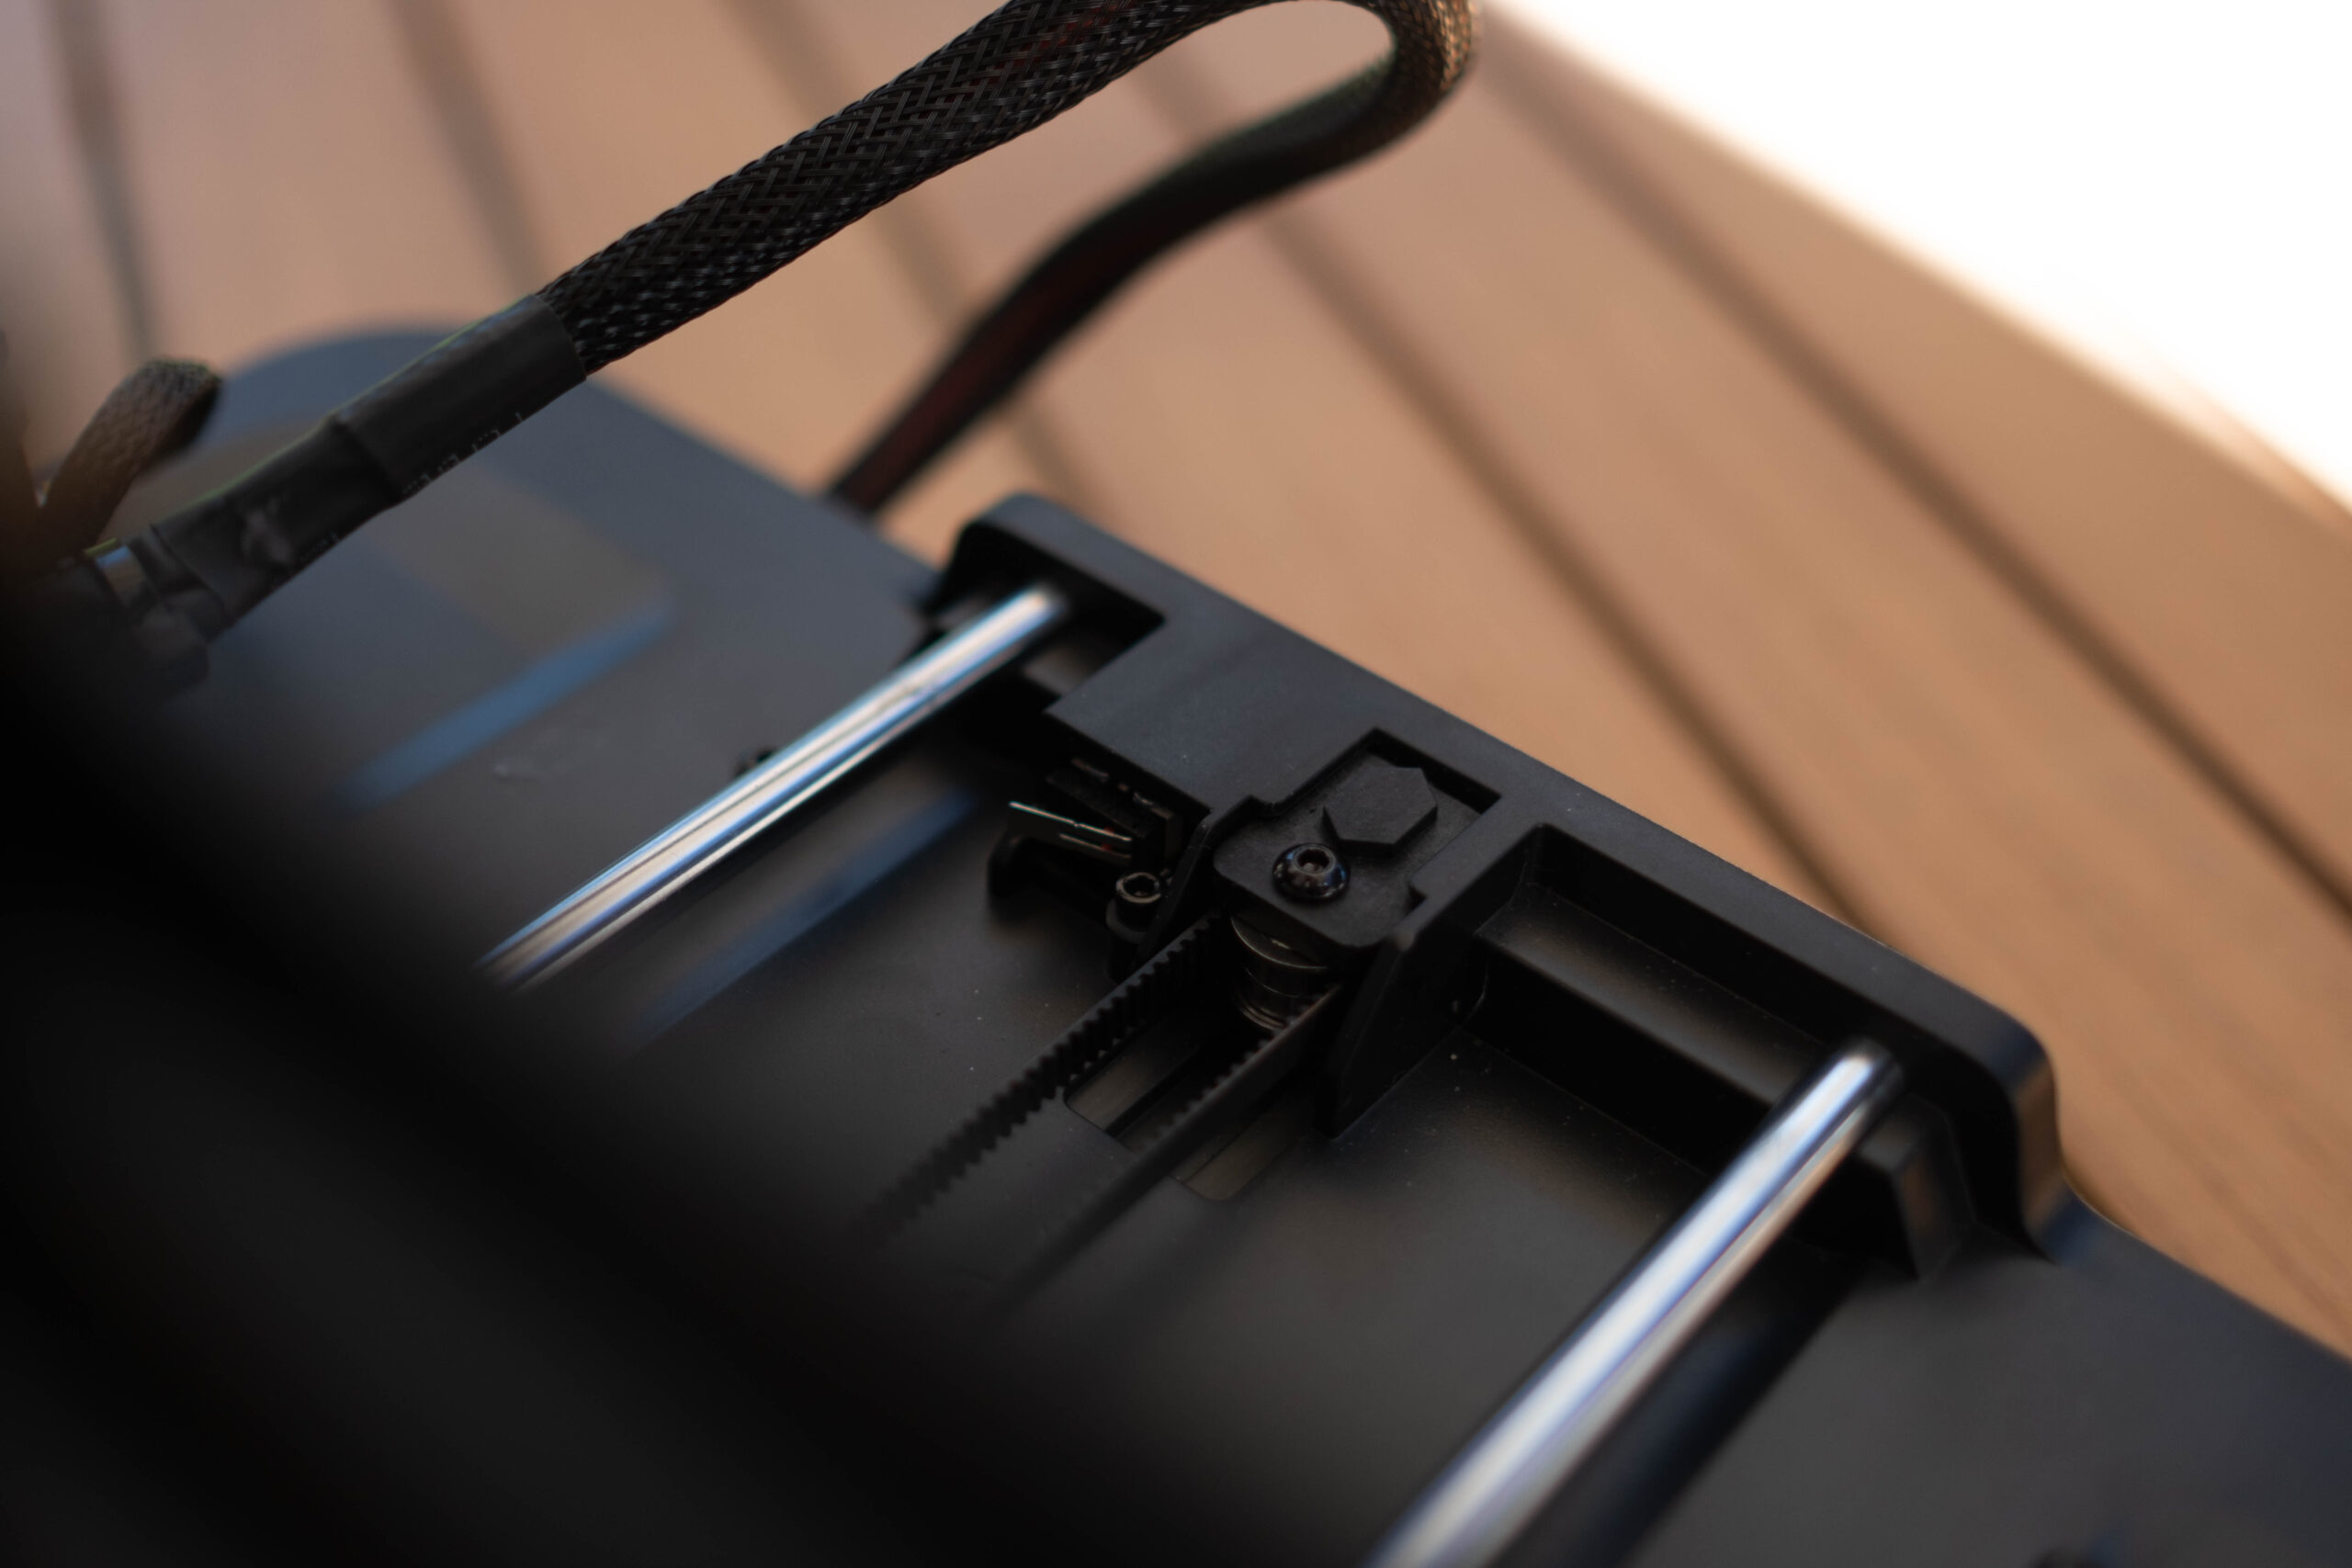
For auto-leveling, Creality uses the CR Touch Sensor, which approaches the print bed fully automatically at 16 points, measures the distance, and thus eliminates the need for tedious manual alignment.
The process takes just under 10 minutes and is completed by the subsequent determination of the Z-offset, which is also automatic, with the aid of a strain gauge. After this, a very good result is usually achieved, which can still be manually adjusted if necessary. In one case, an incorrect Z-offset was determined during Auto-Leveling and the printer subsequently had an offset to the print bed that was too large. In this case, however, a new Auto-Leveling could quickly remedy the situation. In case of doubt, however, it does not hurt to make a note of the “correct” Z-Offset in order to be able to react after Auto-Leveling if necessary.
With the Ender 3 V3 SE at the latest, fully automatic leveling should have arrived in the budget range. Anyone who has ever had to level their printer by hand will be very happy about this important feature at this point.
Print bed
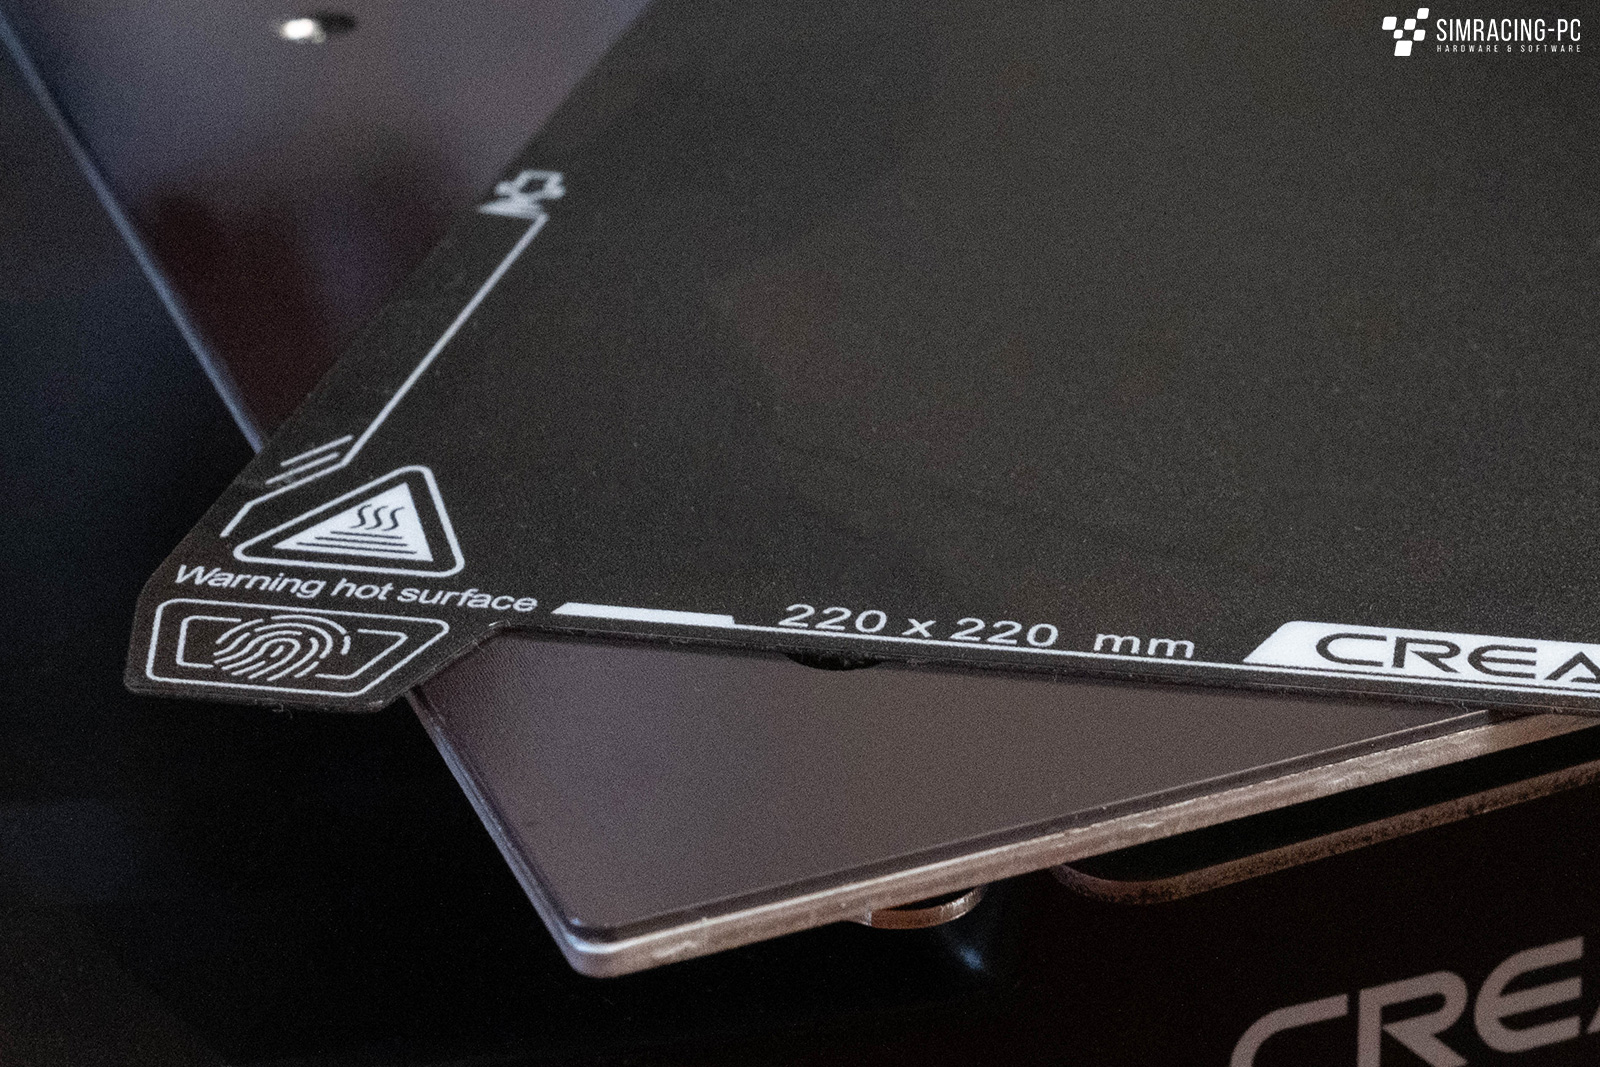
The heated print bed measures 220 x 220 mm and is thus unfortunately a bit too small for most steering wheels from a simracing perspective. On the plus side, however, is definitely the design as a removable magnetic plate, which makes it very easy to remove larger prints in particular by bending them slightly. Even though the lightly textured steel plate provides a good grip, it doesn’t quite come close to the popular PEI printing plates in this area.
Two indentations on the back make it easier to position the plate, and two protruding surfaces on the front ensure that there are no fingerprints on the plate.
Otherwise, the print bed is heated relatively evenly to, for example, 60° for PLA (the deviations were around 5 degrees, measured with a laser thermometer) and there was no unwanted detachment of the parts to be printed during the entire test.
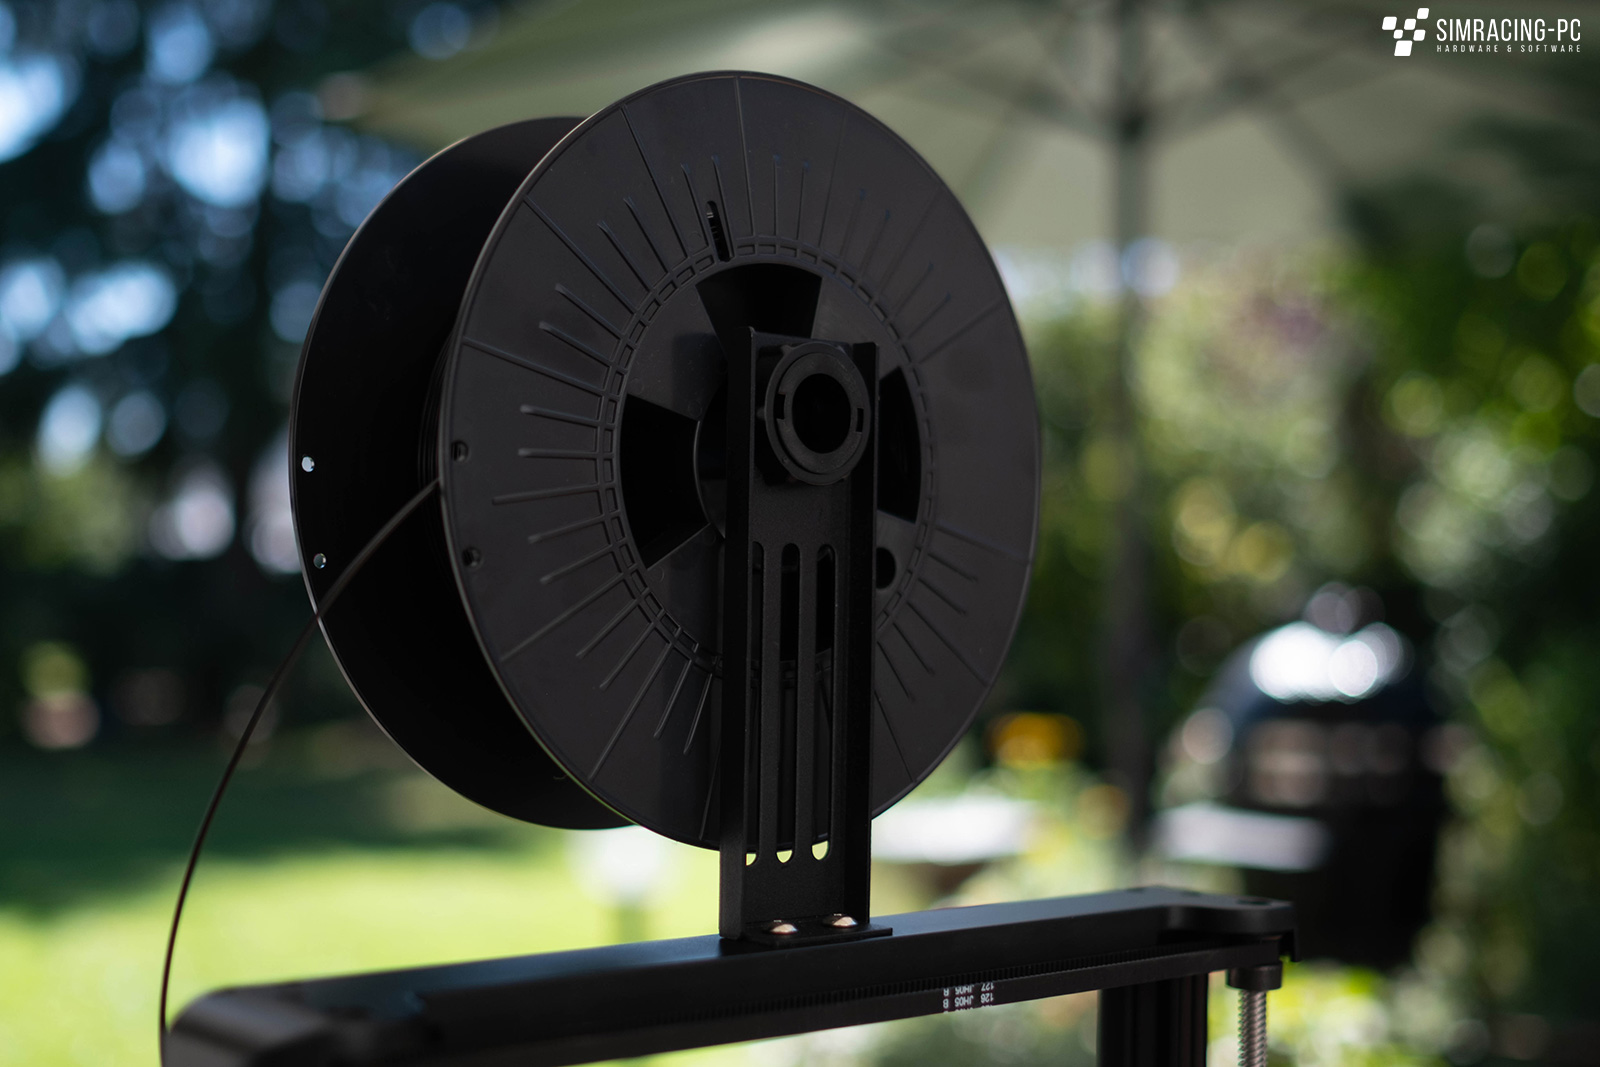
Filament holder
Creality relies on a filament holder on the top of the printer, which keeps the space required in the width very small. This works well, but additional mods from the community for this area should not be long in coming.
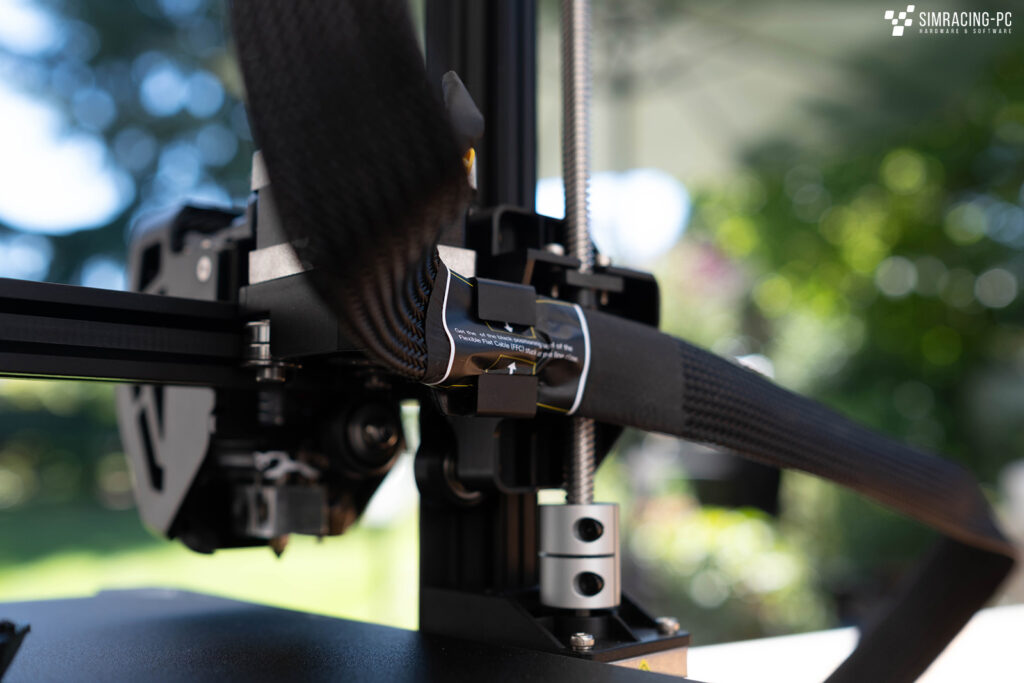
Axis
While some parts of the printer are made of plastic, Creality does not compromise on the axis:
- X-axis: The X-axis consists of an aluminum profile on which the Direct Extruder moves with the help of three rollers (two at the top, one at the bottom). These should be firmly seated, but relatively easy to move. This was already the case with the test unit in its delivery state. If too much play of the wheels or increased abrasion is detected, countermeasures must be taken accordingly when adjusting the system.
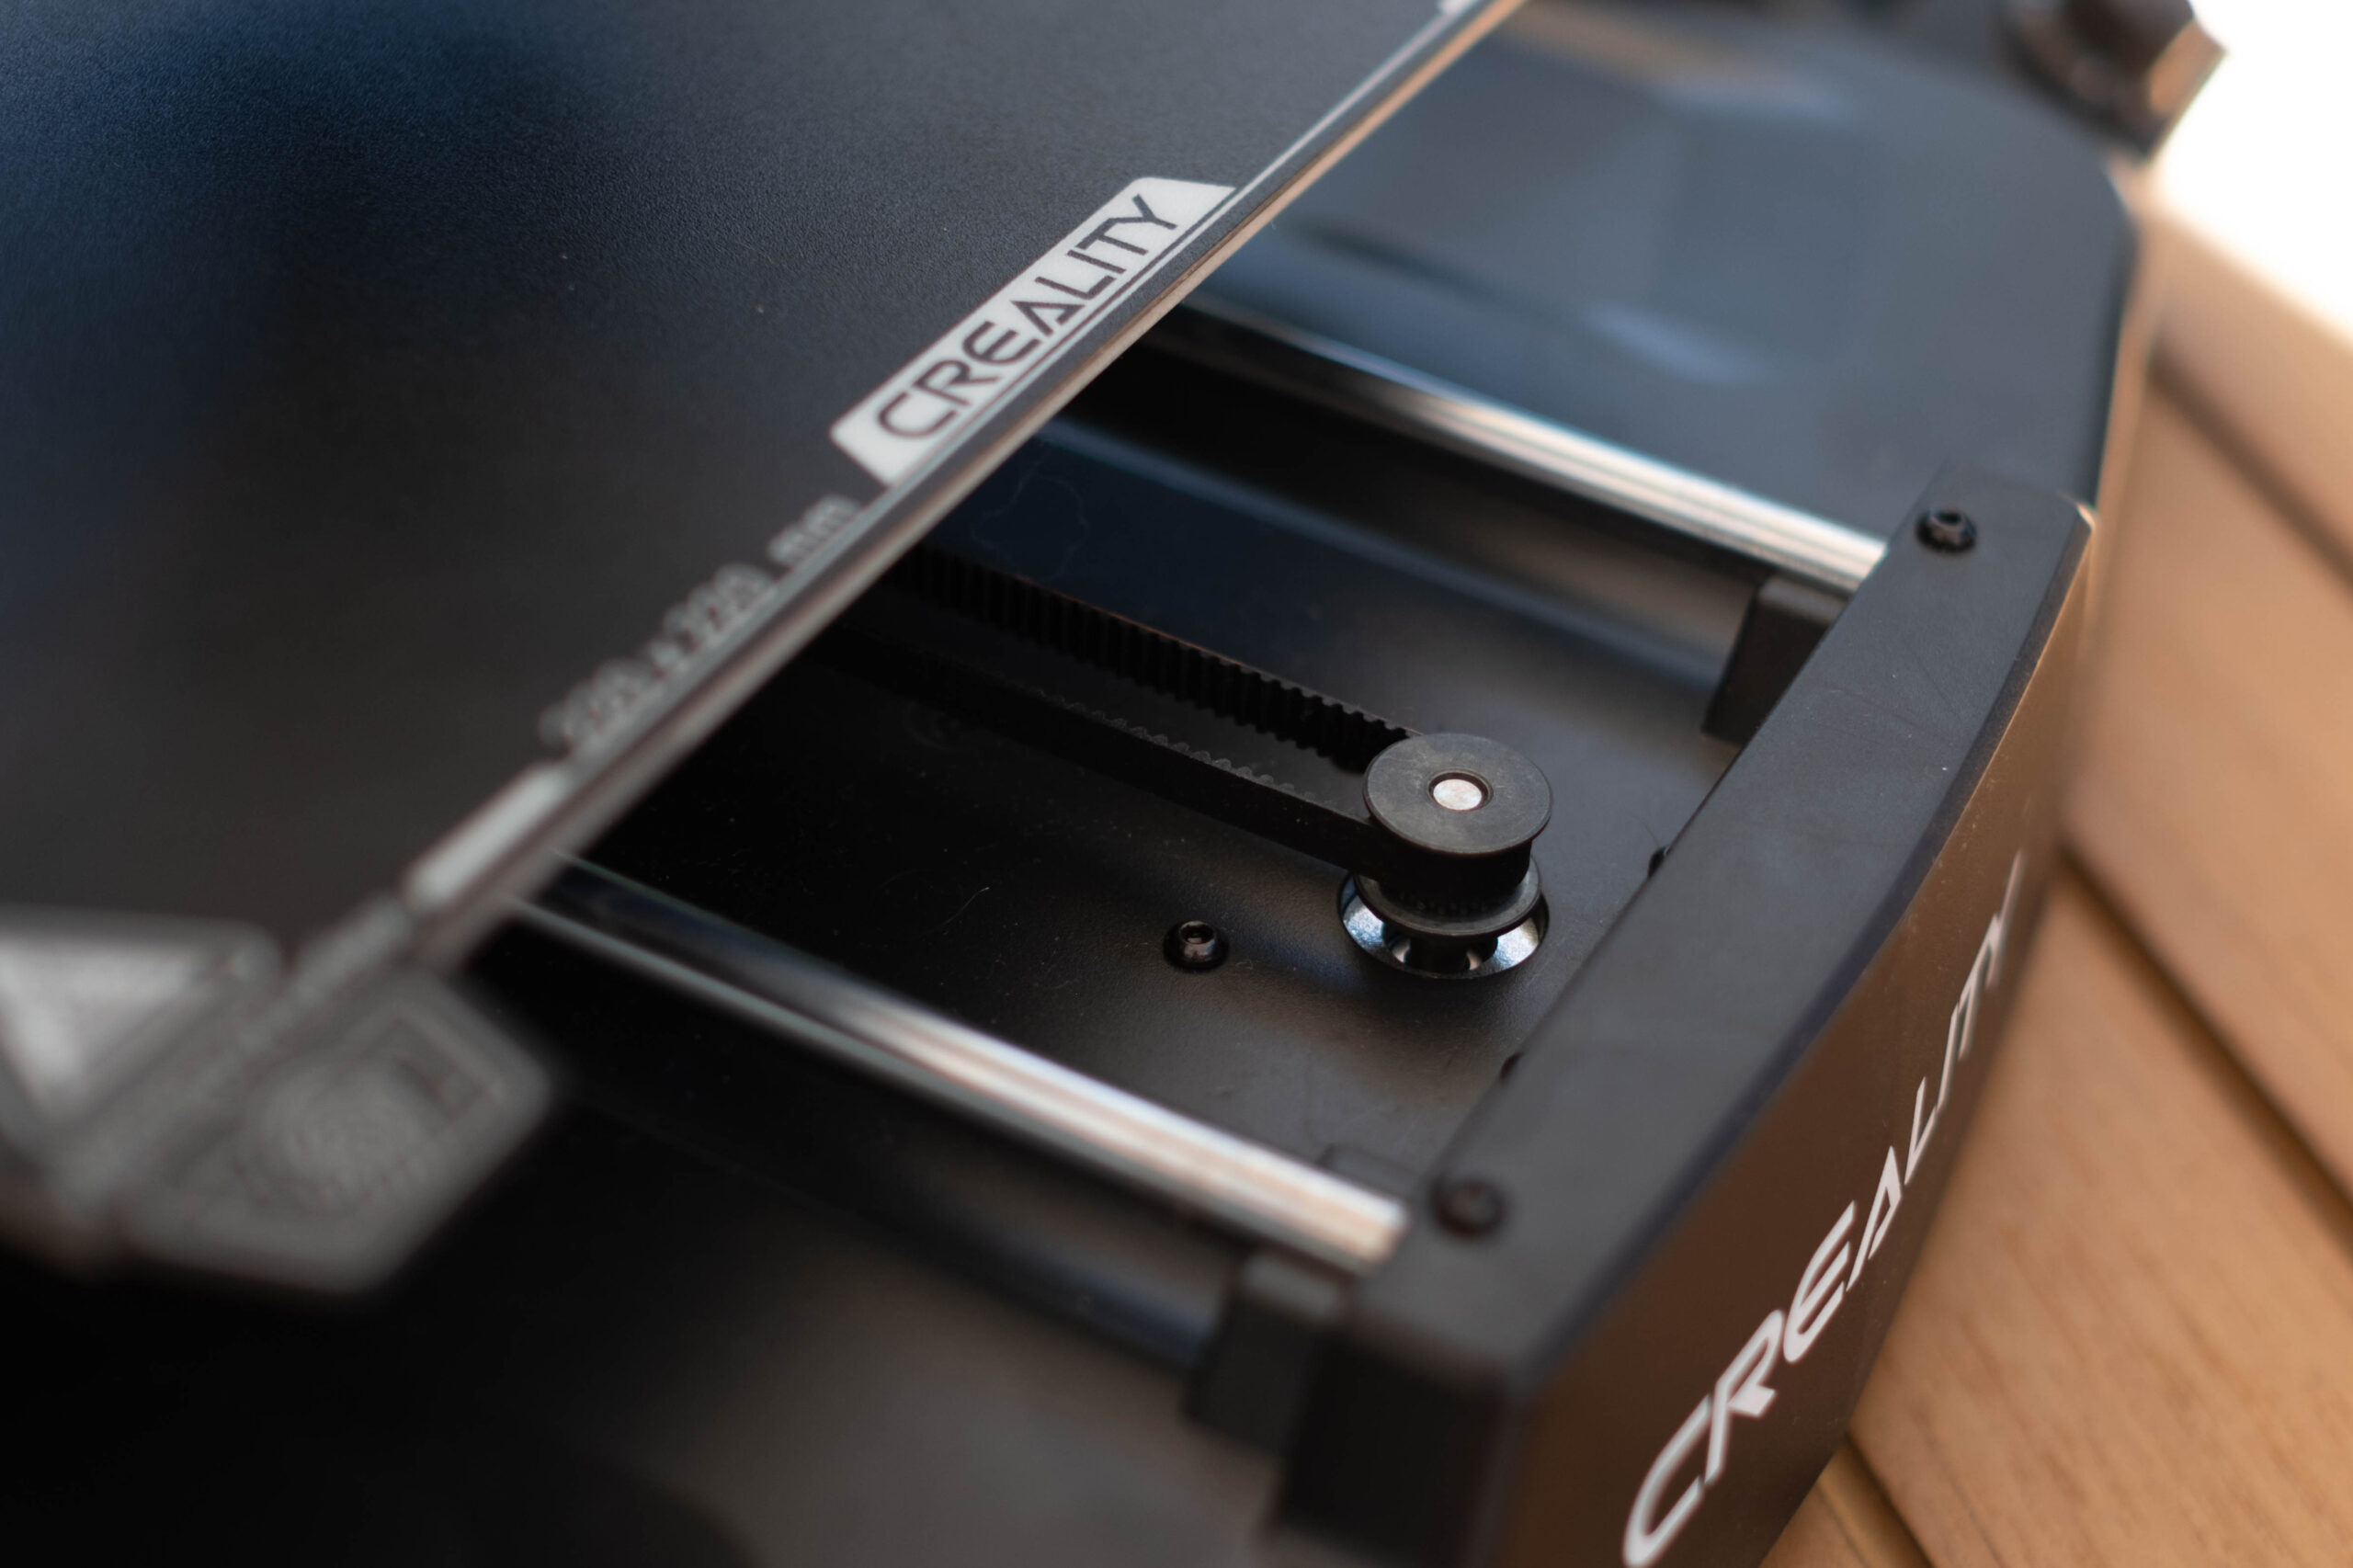
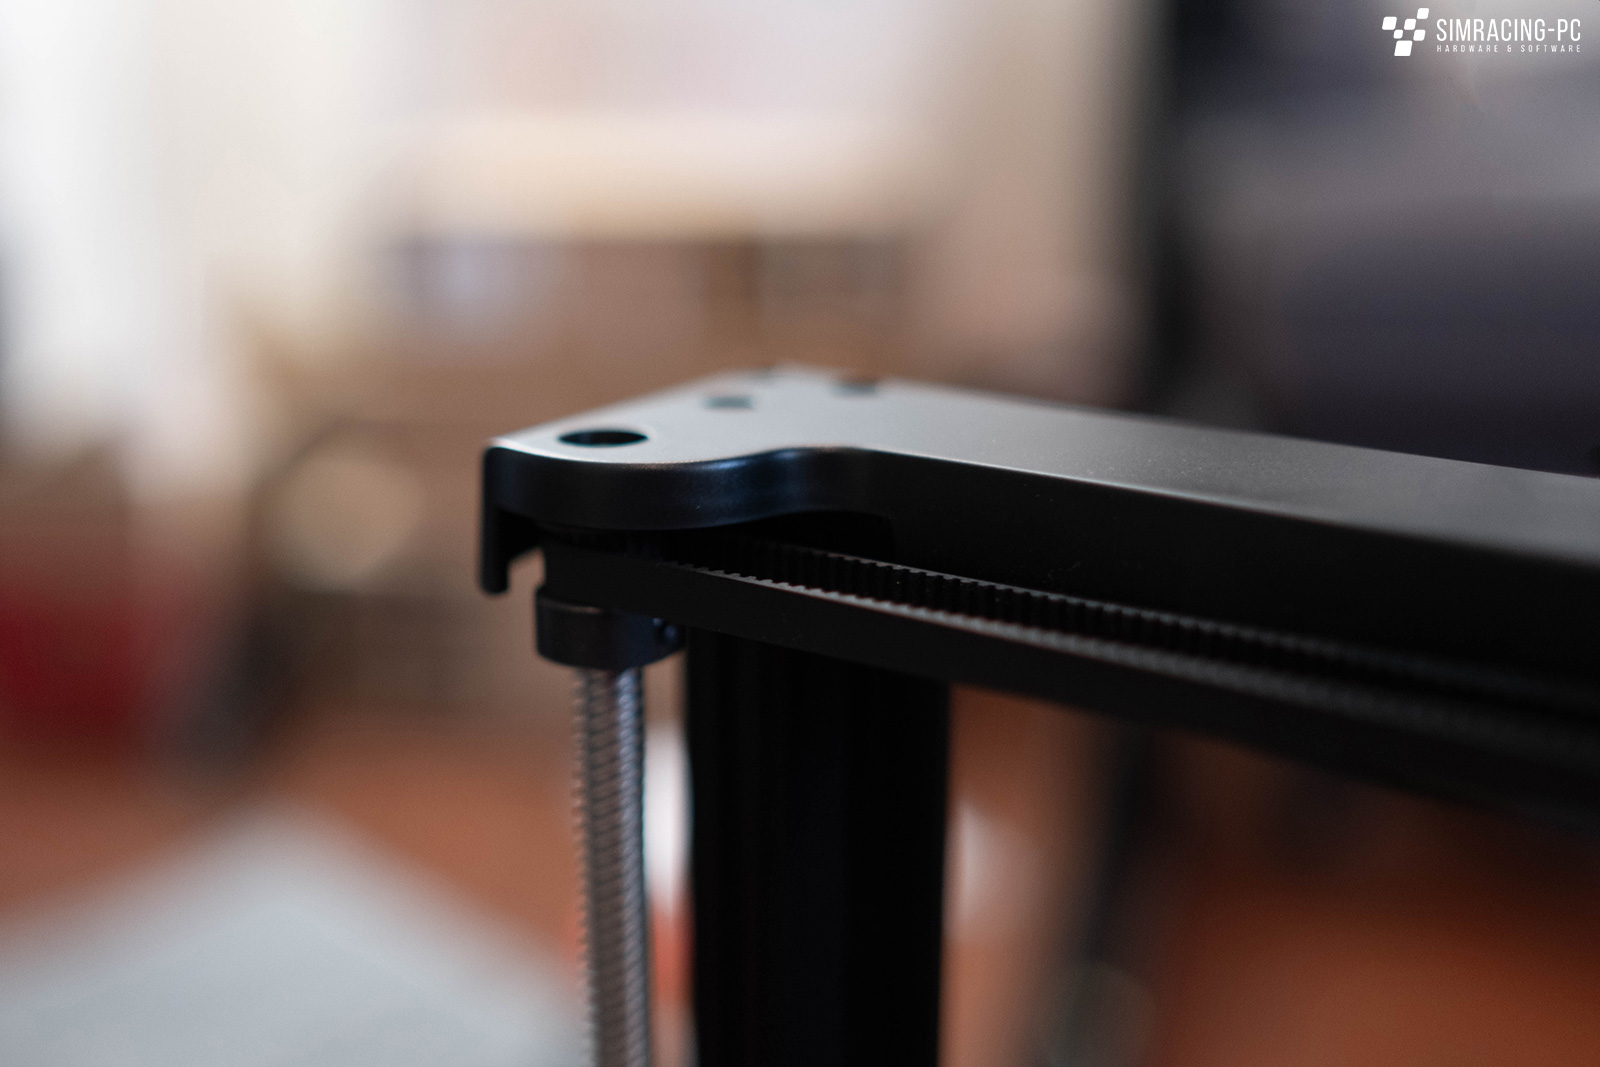
- Y-axis: The Y-axis of the printer moves the print bed back and forth via two 8 mm thick linear shafts made of steel. Power is transmitted via a belt, and the Y-axis is also equipped with an end switch.
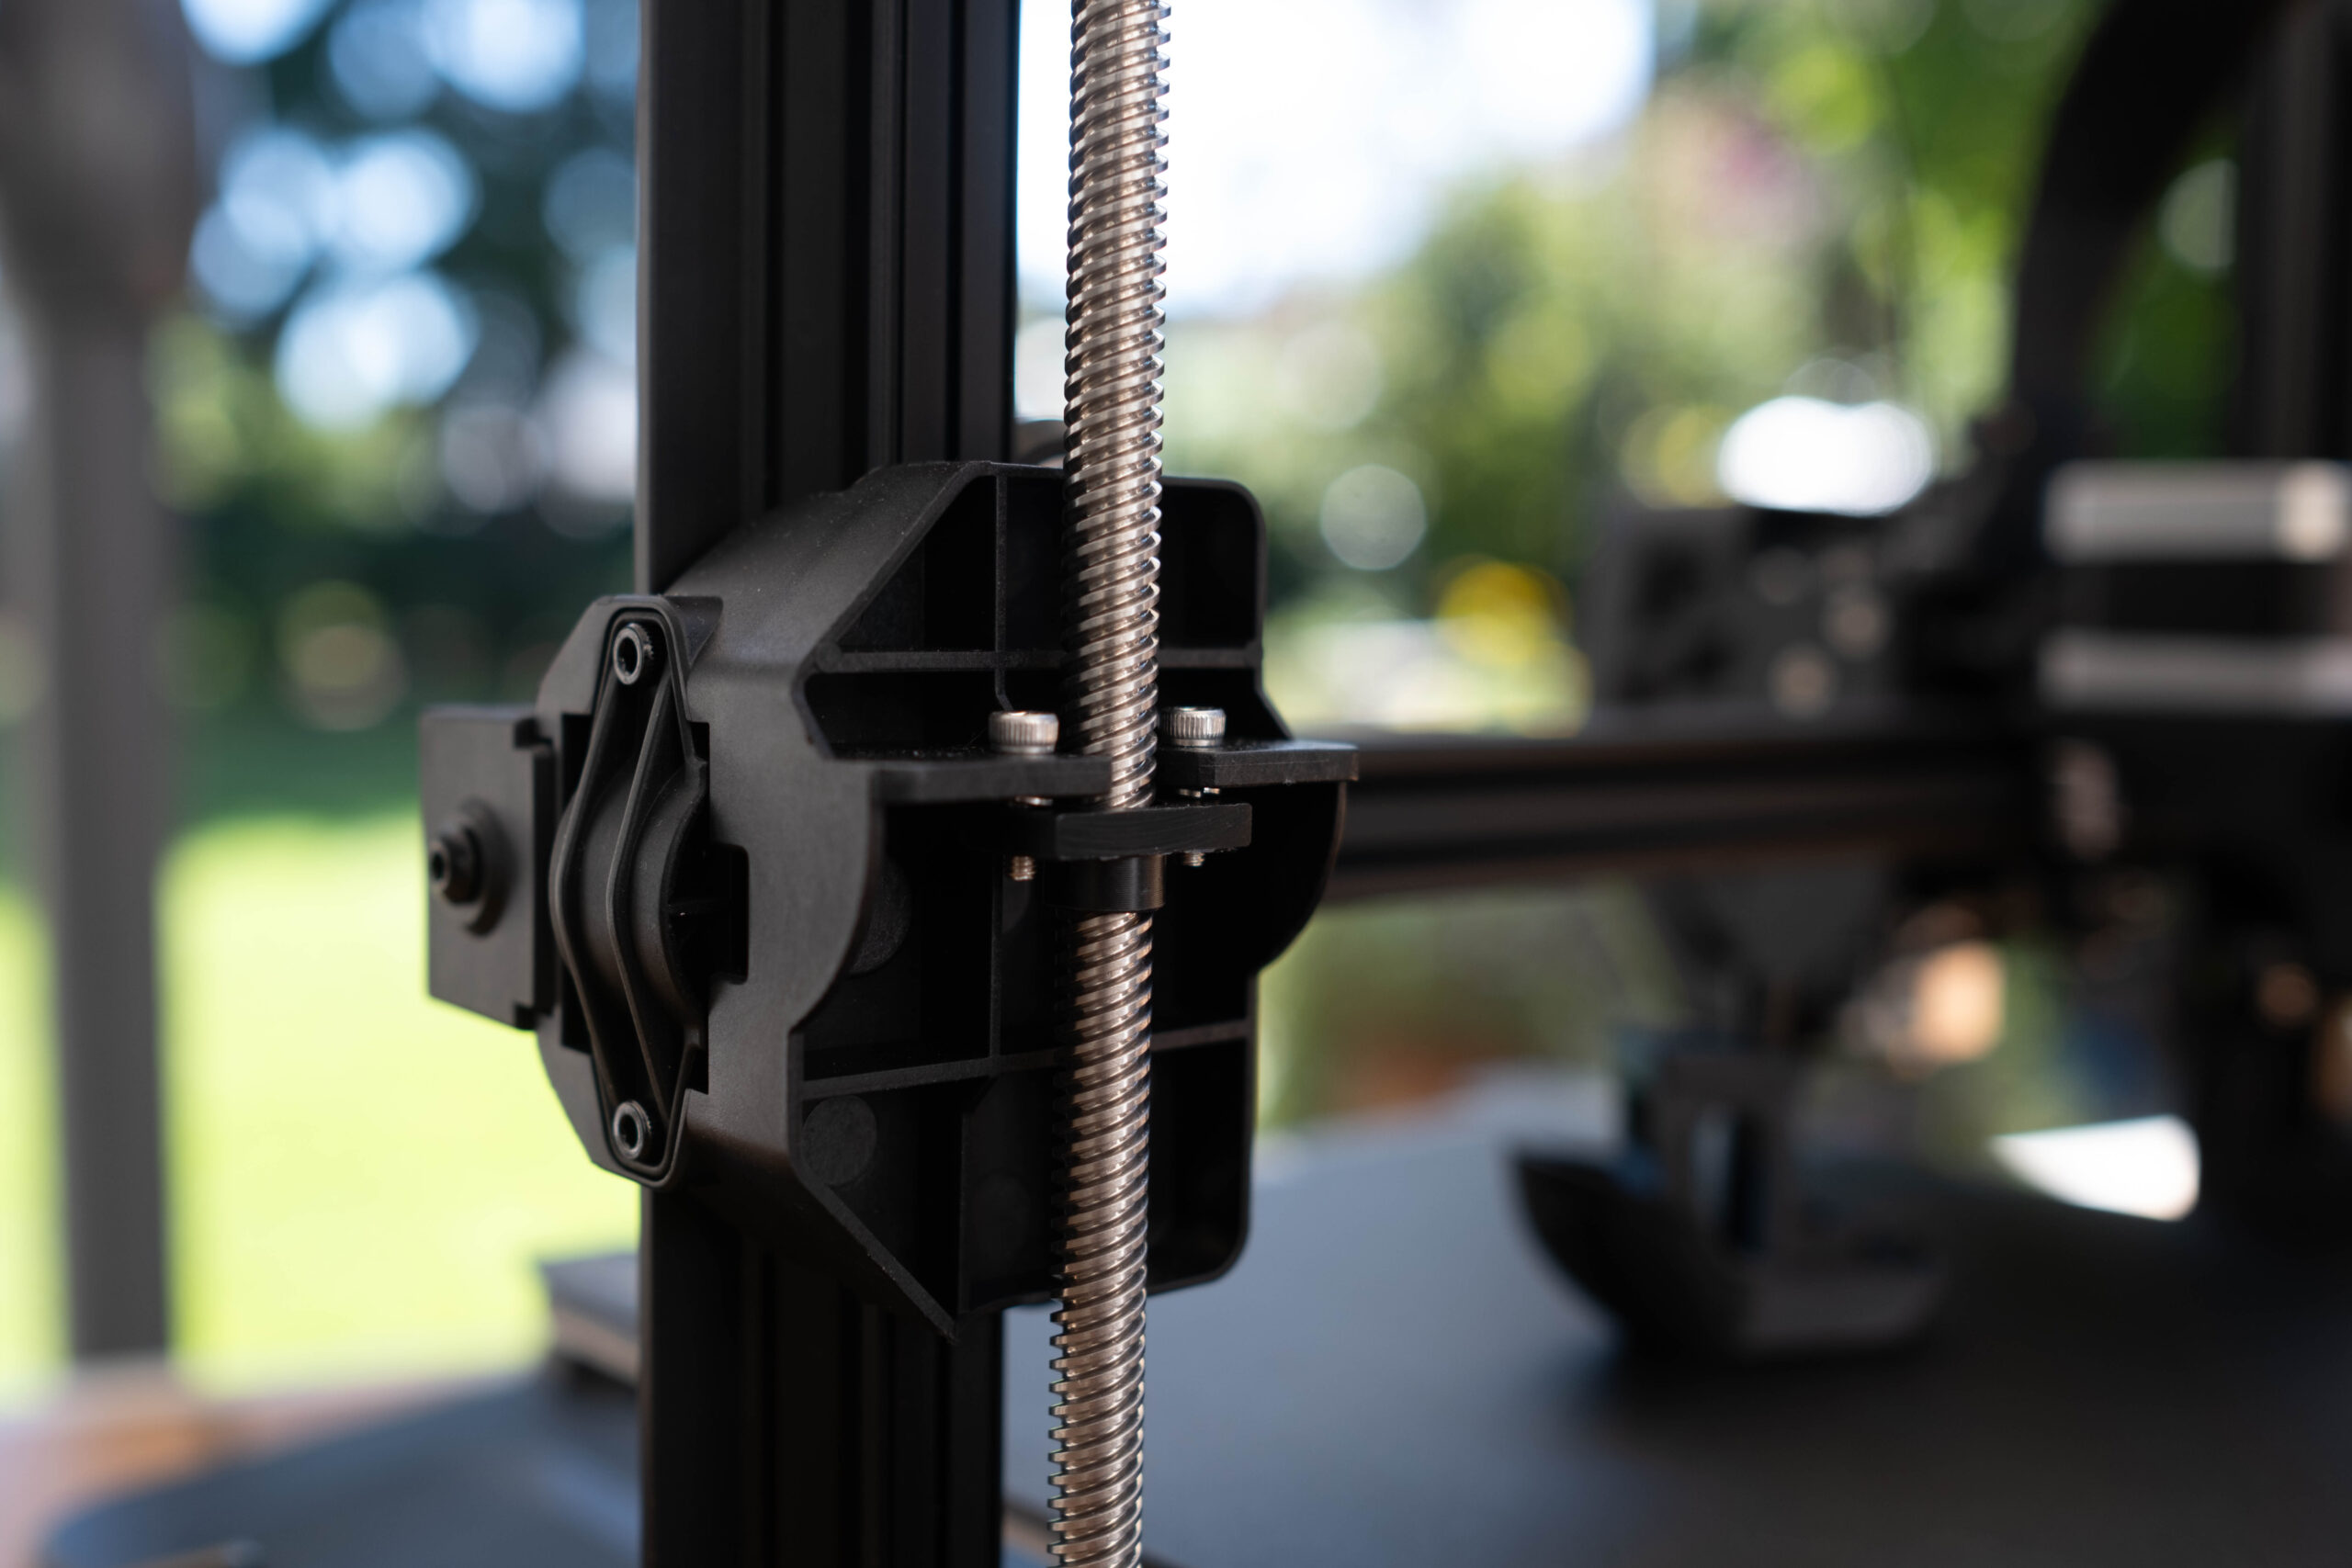
- Z-axis: The rigid Z-axis is built as a double axis and is synchronized via a belt on the top of the printer. This is very good, especially for a printer in this price range, and should be reflected positively in the print results.

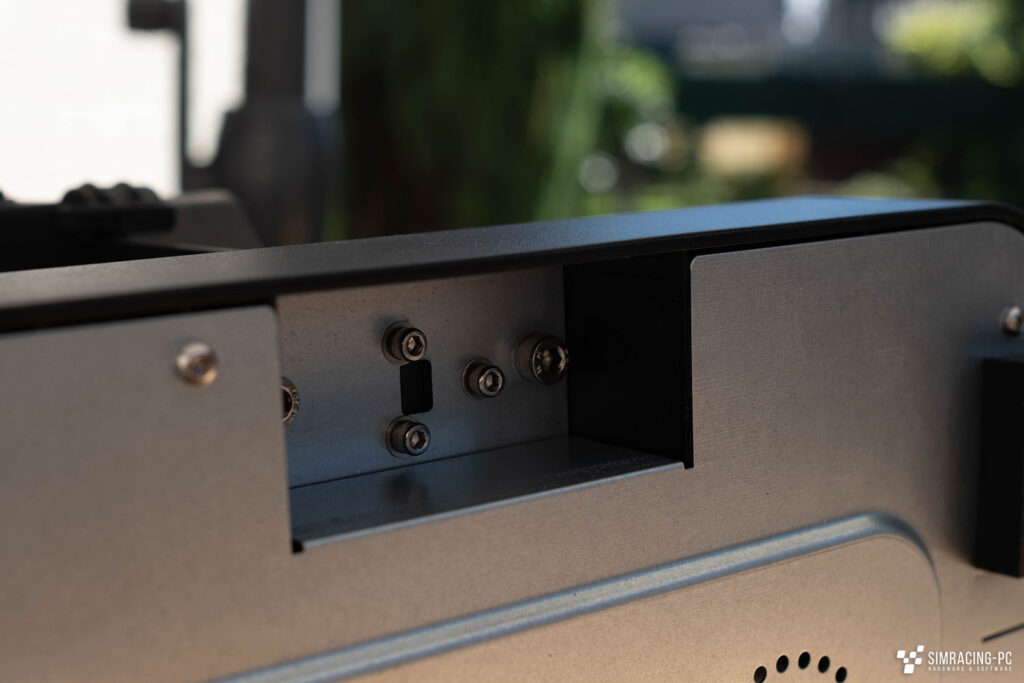
Connections
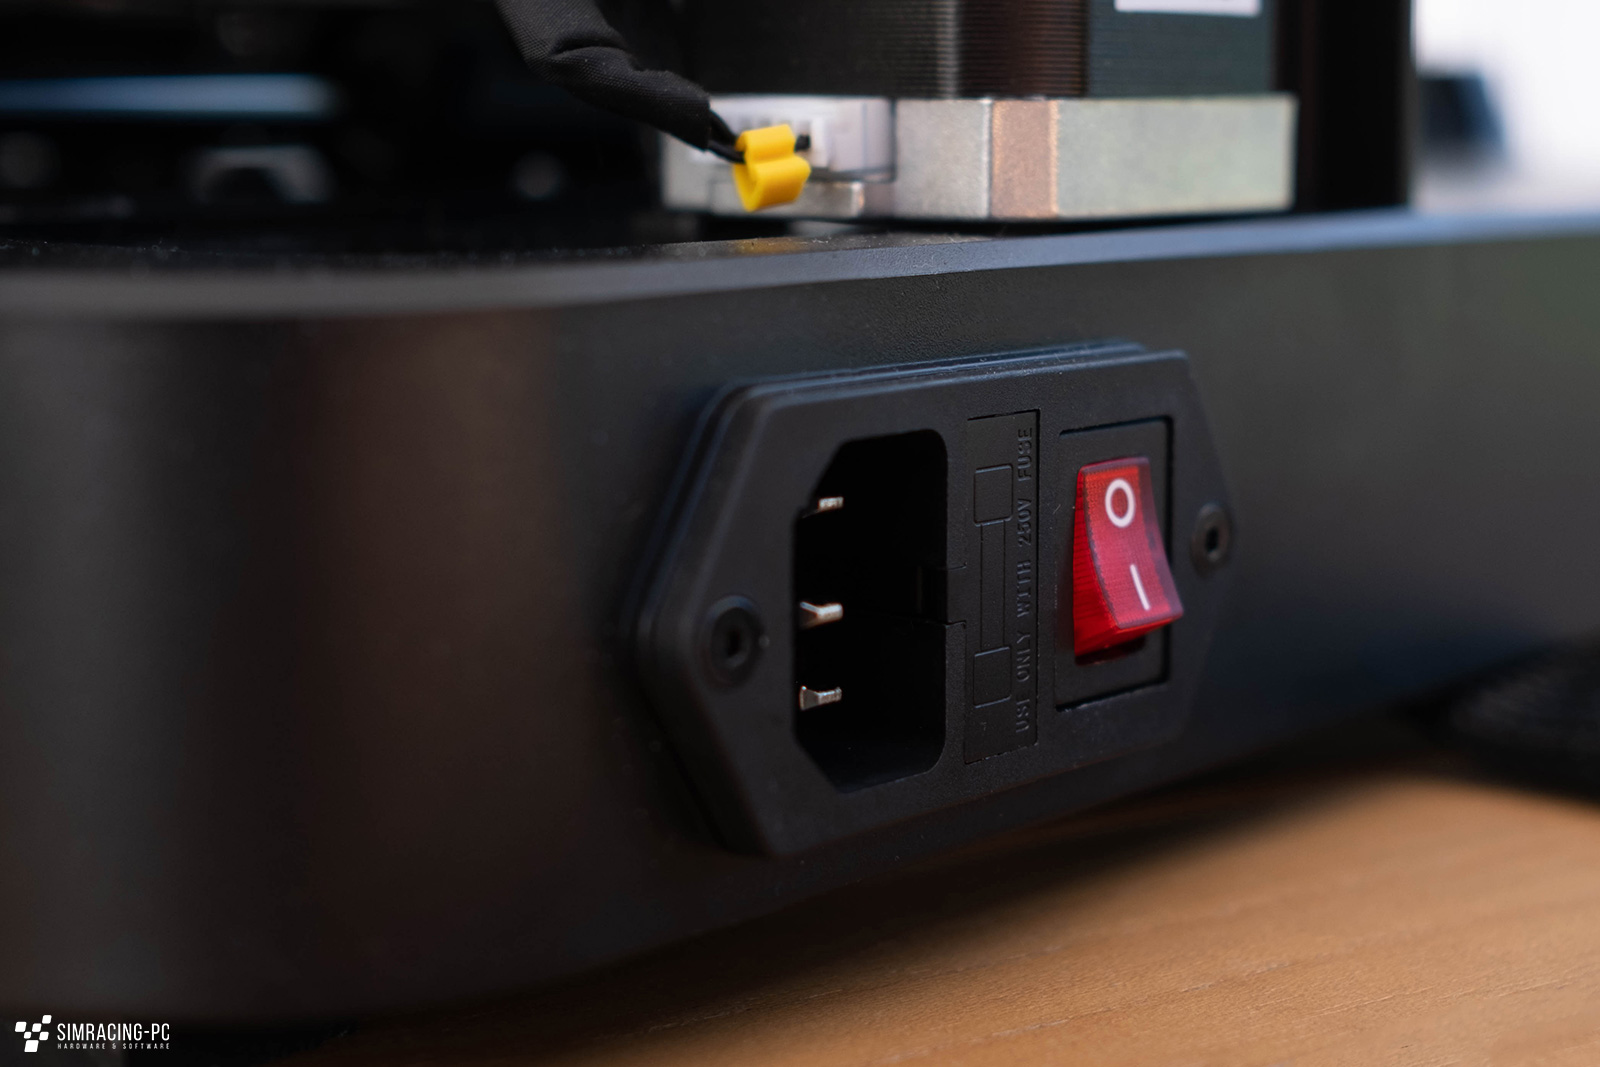
There are no surprises when it comes to the ports. Besides the USB-C port and the SD card slot, there is only one port for the power cord on the side of the printer.
Software
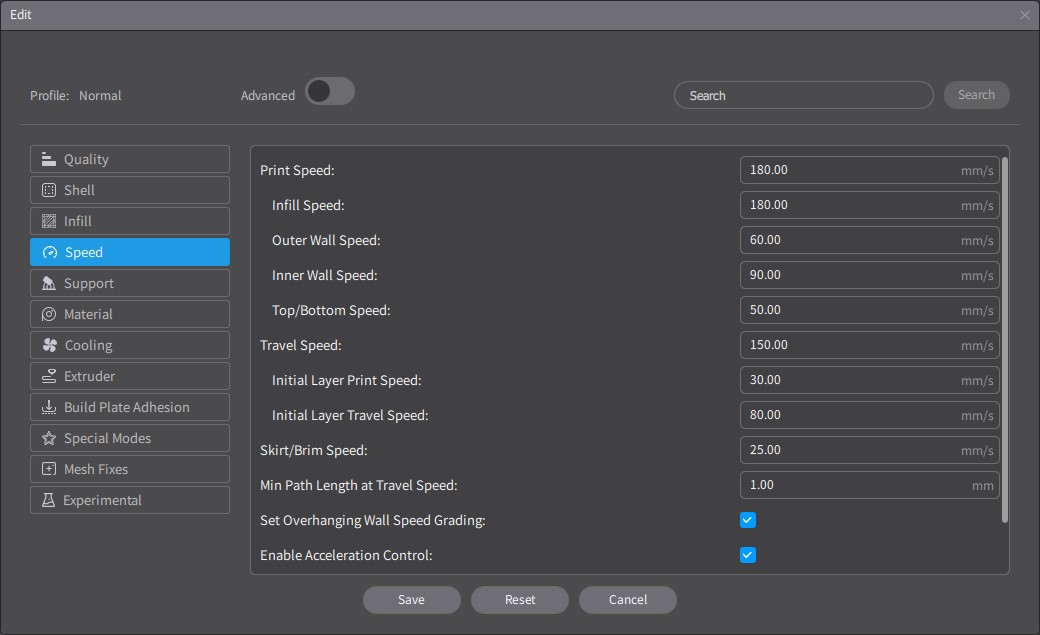
Creality Print
Creality provides the necessary software for the Ender 3 V3 SE on the included SD card. Creality Print’s Cura roots are clearly noticeable and Cura users will find their way around quickly.
During the initial installation, the printer can be selected and the settings provided by Creality can be used. These are already set relatively fast by default, but deliver good printing results without further adjustments or calibrations.
Beginners should take a look at one of the many general tutorials on printer settings and the operation of slicers in general. For first adjustments, however, the partly very detailed tooltips should already provide a good starting point. In any case, it is recommended to activate the “Advances Settings” after a certain period of getting used to the program, in order to have full control over all parameters.
G-Code
Creality has already integrated a custom G code for the printer for the start and end of the printing process. Somewhat impractical is the double strip that the printer applies to the print bed at the beginning of the printing process to clean the nozzles. This ends up in the actual print area and has to be removed by hand if the print area is to be fully utilized.
M220 S100 ;Reset Feedrate
M221 S100 ;Reset Flowrate

G28 ;Home

G92 E0 ;Reset Extruder
G1 Z2.0 F3000 ;Move Z Axis up
G1 X10.1 Y20 Z0.28 F5000.0 ;Move to start position
M109 S[material_print_temperature_layer_0]
G1 X10.1 Y145.0 Z0.28 F1500.0 E15 ;Draw the first line
G1 X10.4 Y145.0 Z0.28 F5000.0 ;Move to side a little
G1 X10.4 Y20 Z0.28 F1500.0 E30 ;Draw the second line
G92 E0  ;Reset Extruder
G1 E-1.0000 F1800 ;Retract a bit
G1 Z2.0 F3000 ;Move Z Axis up
G1 E0.0000 F1800
G91 ;Relative positionning
G1 E-2 F2700 ;Retract a bit
G1 E-2 Z0.2 F2400 ;Retract and raise Z
G1 X5 Y5 F3000 ;Wipe out
G1 Z10 ;Raise Z more
G90 ;Absolute positionning

G1 X0 Y0 ;Present print
M106 S0 ;Turn-off fan
M104 S0 ;Turn-off hotend
M140 S0 ;Turn-off bed

M84 X Y E ;Disable all steppers but Z
Alternatives
As an alternative, you can currently also use the free software Cura or also Simplify3D (starting at 199$), whereby the latter software probably doesn’t really fit the price of Creality’s inexpensive printer due to its high cost. Since the printer is still quite new on the market, you will have to be patient when searching for profiles from the community. Thus, you have to be active yourself here.
3D printing
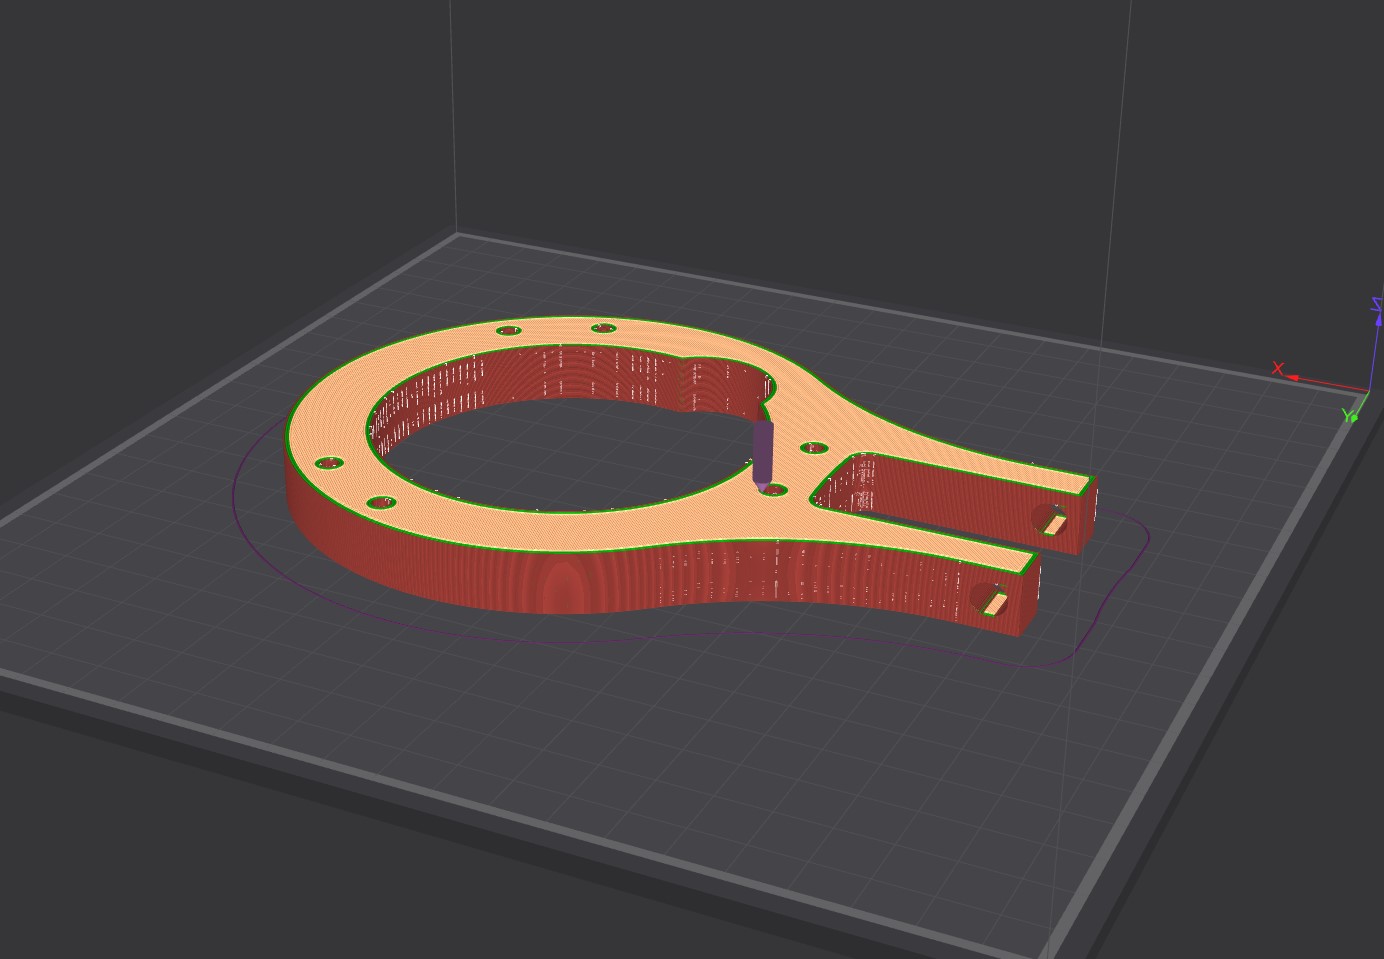
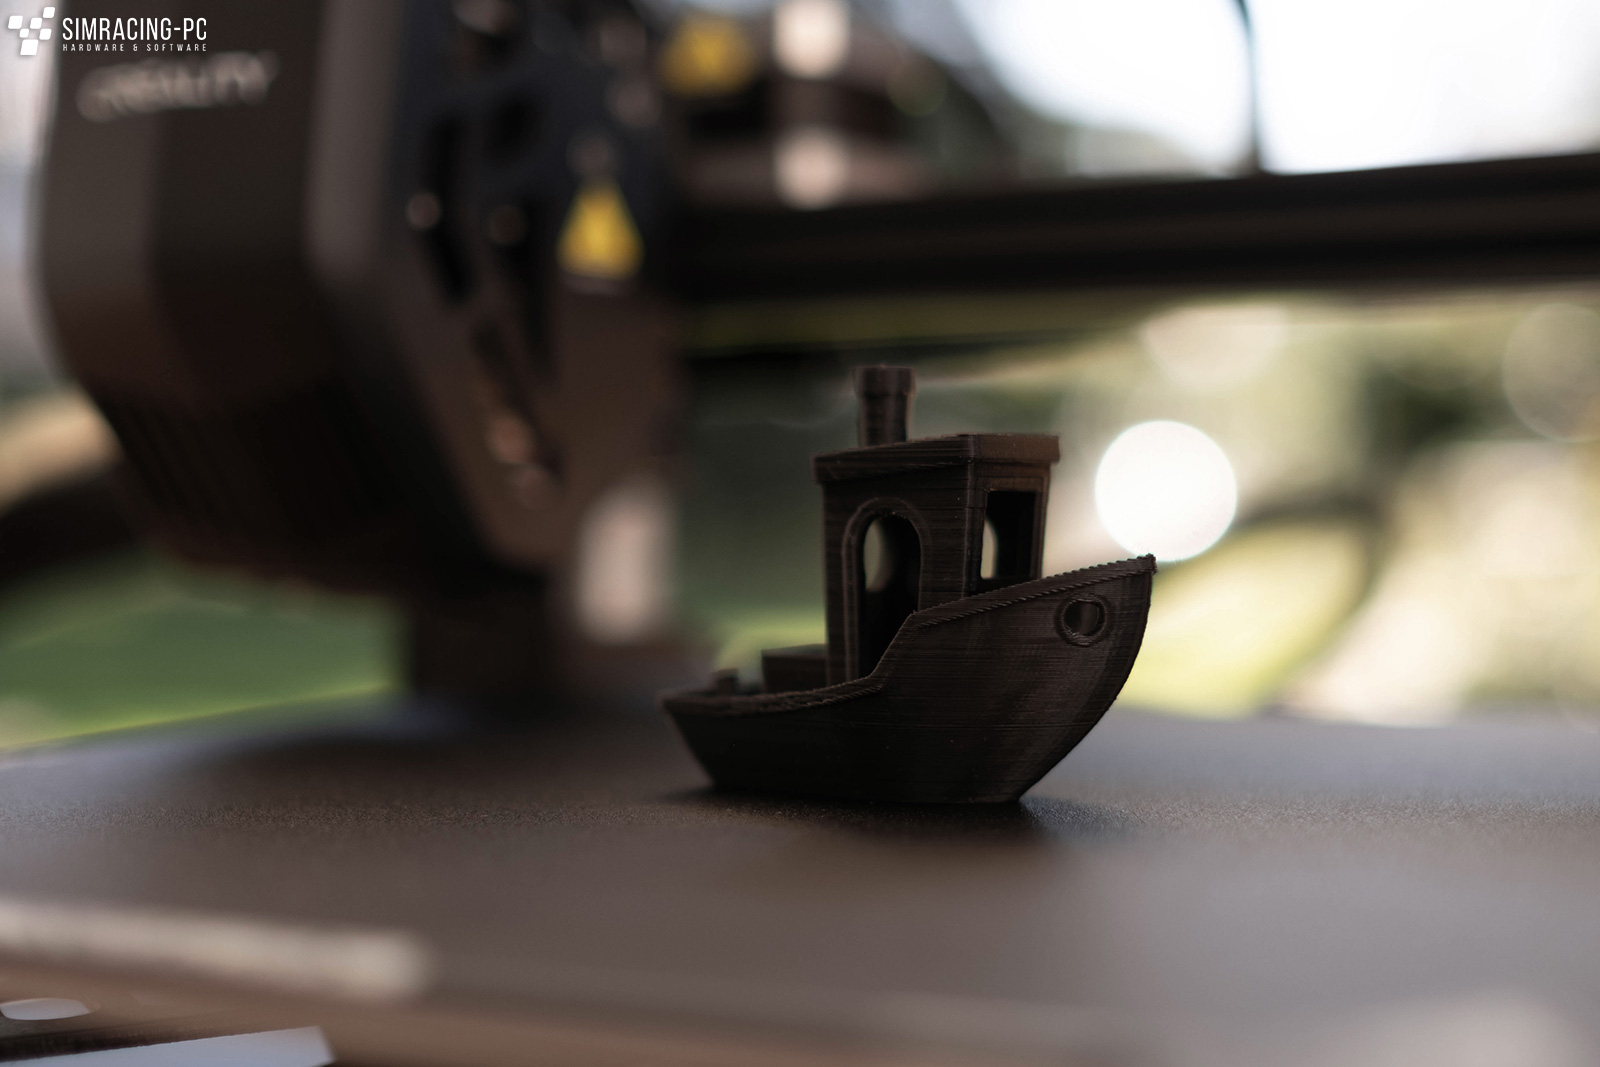
As already mentioned, the printer already delivers very usable results with the standard profile. This applies to the 180mm/s fast first print (PLA) for both the classic Benchy boot and the Calibration Cube, which was already printed very true to size out of the box (20.02 x 19.98 x 20.01mm).
Print speed
Especially impressive is the very high speed of up to 250mm/s for PLA. Creality recommends 180mm/s for a compromise between quality and speed, which is still well above the 50-60mm/s of the price range of printers up to 200€.
The Benchy pictured below was printed in about an hour, the Calibration Cube in about 30 minutes.
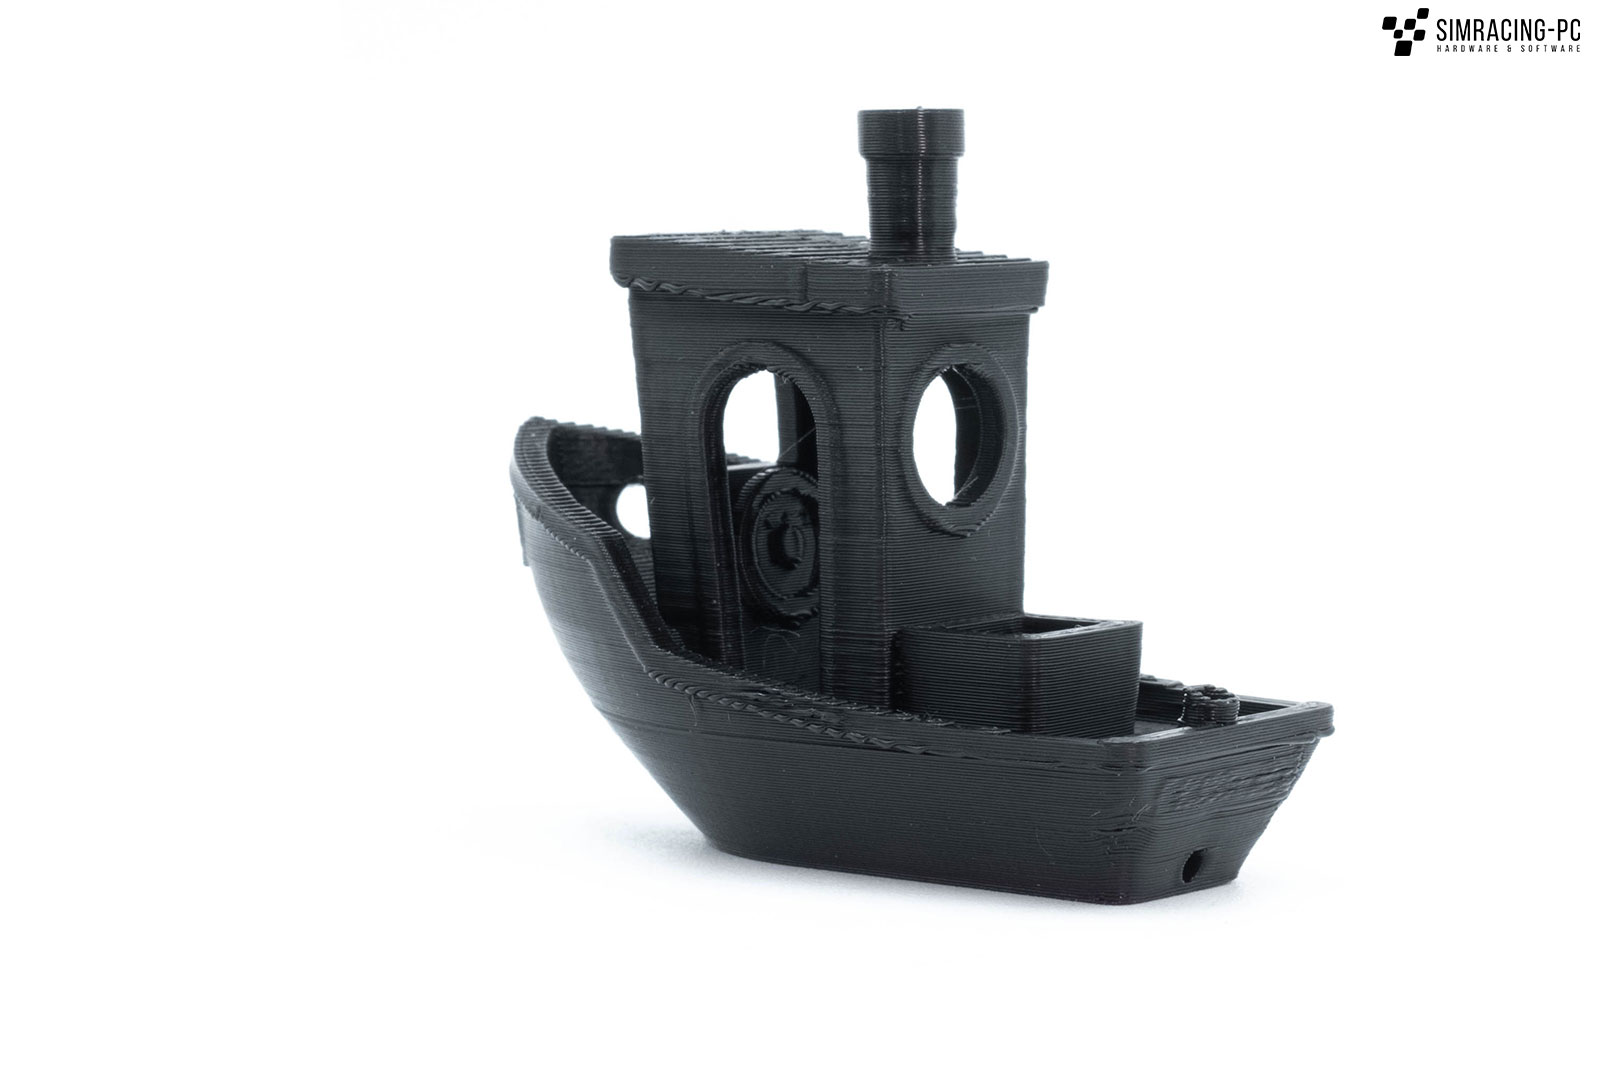
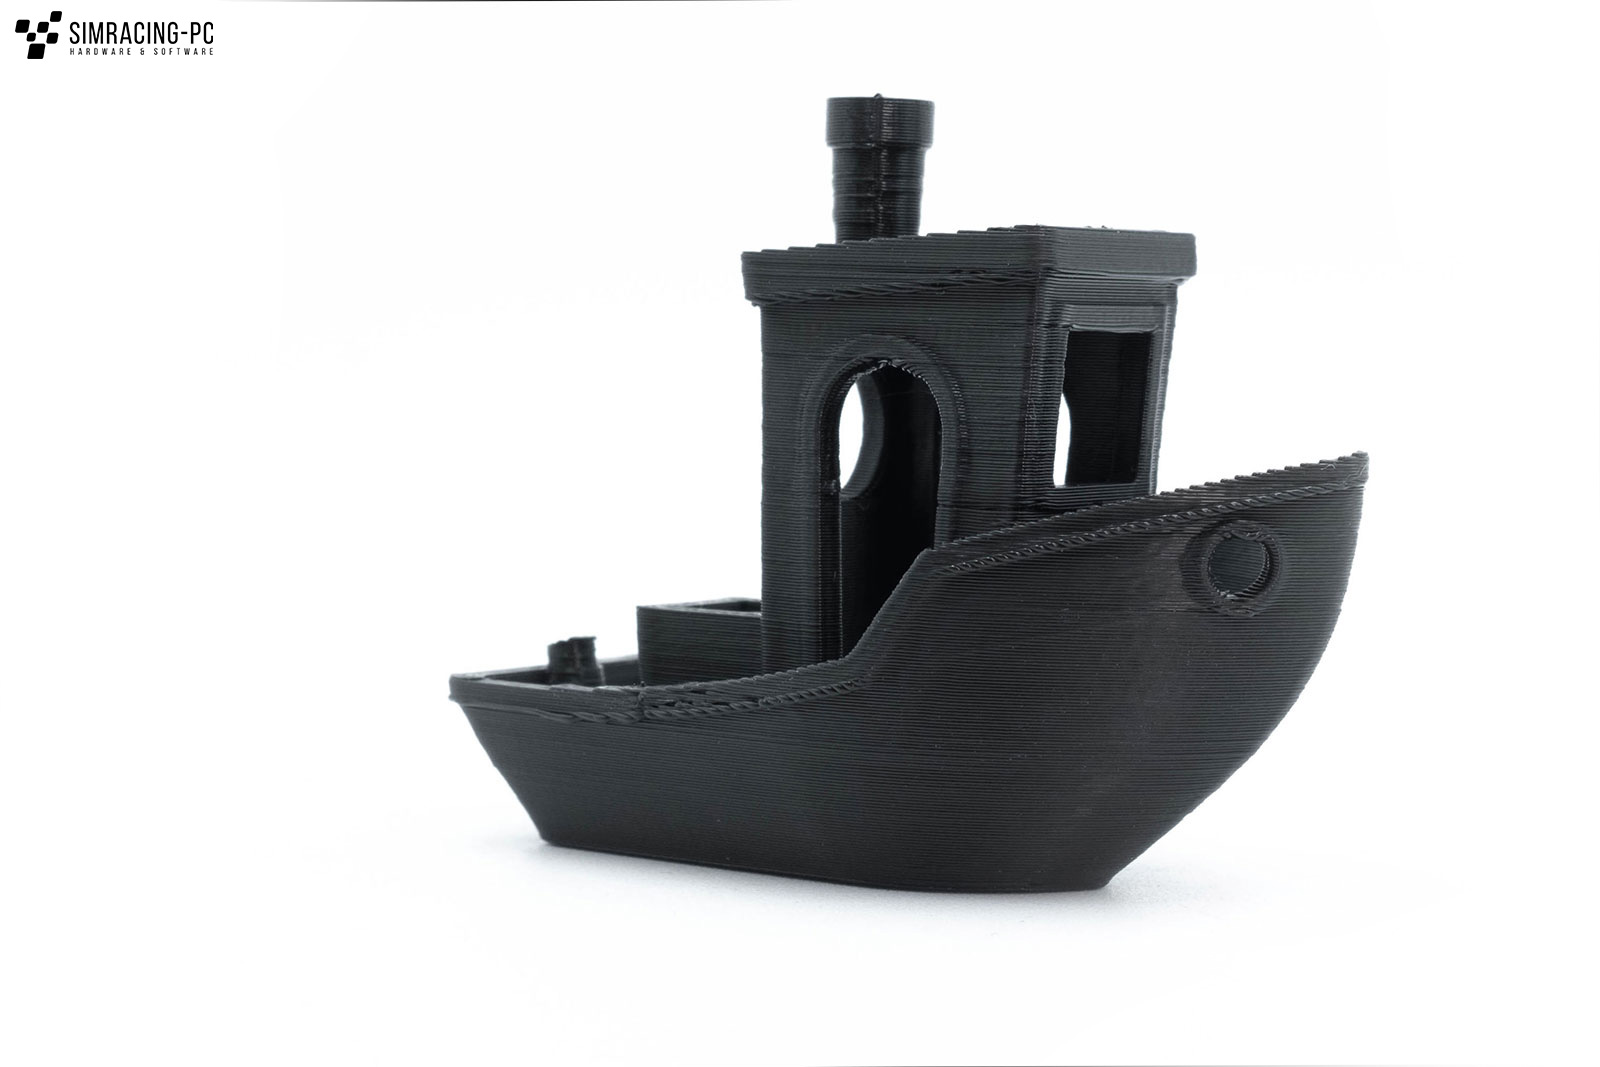
Quality
The quality is no longer perfect at this speed, but it is still more than acceptable. The first layer (printed at 30 mm/s) has good adhesion, the artifacts are within limits and there are no noticeable layer shifts. For an even better print image, the print speed can be reduced a bit. During testing, 120 mm/s proved to be a good compromise between quality and speed. In the next weeks and months, some DIY projects will be found here, in order to be able to better rate the print quality.
Conclusion
Creality clearly gets more right than wrong with the Ender S3 V3 SE. Features like auto-leveling, the magnetic printing plate and the direct extruder with a printing speed of up to 250mm/s (in actual use it is 120 – 180mm/s) make the printer stand out from the crowd of budget devices. The overall package is very appealing and also scores with a good scope of delivery as well as a printer that is already very well set up out of the box. The printer does not have any major weaknesses and is thus a very clear buy recommendation in its price range.
Pros
- Direct-Extruder
- High printing speed
- Auto-Leveling
- Magnetic print bed
- Price/performance ratio
- Compact design
- Scope of delivery
Cons
- Quite small print bed
- Noisy fan at high speeds
- Availability of spare parts
You can save 30€ with the coupon NNNDEV3SE, which results in a price of 199€ including shipping from the EU.


 – Review")

 - Review")

